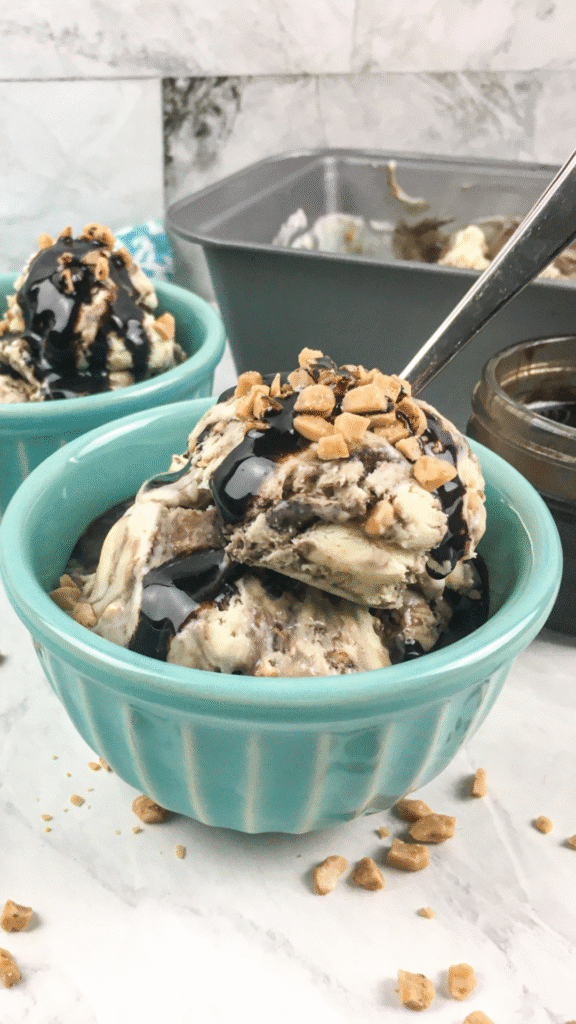
What if you could make rich, creamy, candy-studded ice cream at home without an ice cream maker, without eggs, and without breaking a sweat?
That’s the magic of this no-churn toffee chocolate ice cream. It’s proof that you don’t need fancy equipment to craft a dessert that feels indulgent, nostalgic, and wildly satisfying.
This recipe was born out of a craving, a sudden, can’t-ignore-it longing for that buttery crunch of a Heath Bar nestled into swirls of smooth chocolate. I wanted something that tasted like it came straight from a vintage soda shop but could be made in a modern kitchen with simple, store-bought ingredients. No eggs to temper. No custards to cook. Just good old-fashioned whisking, folding, and freezing.
You’ll love how quickly it comes together (just 20 minutes of hands-on time), and the results are pure scoopable joy. It’s kid-friendly to make, easy to customize with your favorite add-ins, and perfect for everything from casual summer barbecues to cozy date nights.
If you’ve ever felt intimidated by the thought of making ice cream at home, this is your gentle nudge to try it. No churn. No hassle. Just creamy, dreamy chocolate toffee bliss, straight from your freezer.
💛 Why You’ll Love This Recipe

This isn’t just any homemade ice cream; it’s your new go-to treat when you want something indulgent without the equipment, fuss, or wait.
- No Machine Required: Forget bulky appliances or complicated custards. All you need is a bowl, a whisk (or hand mixer), and your freezer. It’s a true beginner-friendly recipe that delivers professional-level results with creamy, scoopable, and full of flavor.
- Decadently Creamy: The secret? Whipping heavy cream and folding it into sweetened condensed milk. This method traps air just like an ice cream maker would, giving you a silky, luscious texture that melts on your tongue. It’s like magic with minimal effort.
- Totally Customizable: Love caramel more than chocolate? Want to throw in chopped cookies or swirl in peanut butter? You absolutely can. This recipe is a blank canvas for all your favorite add-ins and flavor twists. So get creative and make it your own!
- Great for Make-Ahead: Whether you’re prepping for a dinner party or just stocking your freezer with treats, this recipe freezes beautifully. Store it in an airtight container, and it’ll stay fresh and creamy for up to two weeks (if it lasts that long!).
- A Guaranteed Crowd-Pleaser: Chocolate and toffee are a timeless duo, rich, slightly bitter cocoa swirled with buttery, crunchy candy bits. It hits all the right notes and satisfies kids, adults, and sweet tooths alike. One bite and people will ask for the recipe.
- Naturally Gluten-Free: No flour or hidden ingredients here. As long as you double-check your toffee brand for gluten-free certification, this dessert is safe for those avoiding gluten, without compromising on texture or taste.
🧾 What Ingredients Are In This Recipe?

This no-churn chocolate toffee ice cream keeps it simple with just a handful of easy-to-find ingredients that deliver bold flavor and a dreamy texture. Here’s what you’ll need and why each one matters:
For the Homemade Chocolate Syrup:
| Ingredient | Purpose |
|---|---|
| Water | Helps dissolve the sugar and cocoa powder into a smooth, pourable syrup. |
| White sugar | Adds sweetness and balances the deep cocoa flavor. Cane sugar works too. |
| Unsweetened dark cocoa powder | Provides intense chocolate flavor with slight bitterness; adds depth and color. |
| Real vanilla extract | Enhances the chocolate with a warm, aromatic finish; best to avoid artificial vanilla. |
| Salt | Sharpens flavors and prevents the syrup from tasting flat. |
Pro Tip: Make the syrup ahead of time so it has plenty of time to chill. Warm syrup will deflate your whipped cream and ruin the texture.
For the Ice Cream Base:

| Ingredient | Purpose |
|---|---|
| Heavy cream | Whipped to create lightness and air, giving the ice cream a creamy, fluffy texture. |
| Sweetened condensed milk | Acts as the sweetener and base; it keeps the ice cream smooth without needing eggs or a machine. |
| Real vanilla extract | Adds depth and enhances the overall flavor of the ice cream. |
| Chocolate syrup (chilled) | Swirled in for rich chocolate ribbons; must be cold to avoid melting the whipped cream. |
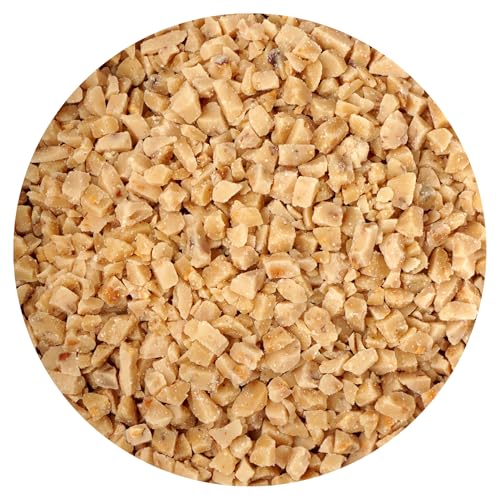
| Toffee bits | Provide crunchy texture and buttery caramel flavor throughout. |
Substitution Ideas:
Can’t find Heath toffee bits? Use:
- Crushed Skor bars
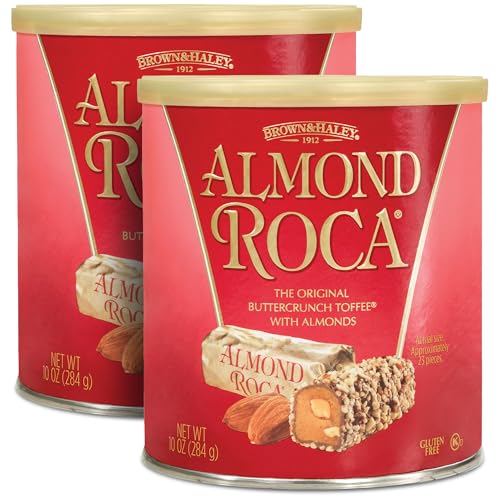
- Almond Roca
- Homemade toffee chunks
- Chocolate-covered honeycomb candy
- Just be sure they’re small enough to scoop easily.
✅ Ingredient Tip:
- Always use cold heavy cream for faster whipping.
- Chill your chocolate syrup completely before swirling to avoid melting the airy base.
- If serving guests with dietary needs, double-check your toffee candy for allergens like gluten, dairy, or nuts.
🛠️ What Tools Do You Need For This Recipe?


No ice cream maker? No problem. One of the best things about no-churn ice cream is how low-tech it is. No fancy gadgets, just a few reliable kitchen tools that you likely already have on hand. Here’s a breakdown of each tool and why it matters for getting that creamy, scoopable texture every time:
| Tool | Usage Description |
|---|---|
| Mixing Bowl | For whipping cream, mixing ingredients, and folding the base together. |
| Measuring Cup and Spoon Set | Ensures accurate measurement of small ingredients like vanilla and salt. |
| Kitchen Towels | Useful for wiping spills, stabilizing bowls, and general cleanup. |
| Spatula | Ideal for folding whipped cream into the base without deflating it. |
| Sauté Pan | Used to prepare the homemade chocolate syrup evenly over medium heat. |
| Whisk | Helps blend syrup ingredients smoothly, avoiding lumps in the cocoa mixture. |
| Airtight Container | Store leftover syrup or ice cream to keep it fresh and prevent freezer burn. |
| Electric Hand Mixer | Whip heavy cream quickly and efficiently to stiff peaks. |
| 9”x5” Loaf Pan | Freezer-friendly pan for layering and setting the ice cream. |
| Kitchen Spoon | For stirring ingredients or serving mix-ins like toffee bits. |
| Plastic Wrap | Covers the ice cream to prevent ice crystals and preserve texture. |
| Ice Cream Scoop | Makes serving neat, even scoops of finished ice cream. |
🧊 ToolTip: For faster, more even freezing, use a metal loaf pan. It chills quicker than glass or ceramic, helping your ice cream set properly and hold its shape when scooping.
Bonus Tips & Optional Tools:

- Freezer-safe airtight container: Great for longer storage and stacking in the freezer. Look for BPA-free options with tight-fitting lids.
- Mini ice cream scoops: Perfect for entertaining or serving tasting portions at events.
- Silicone loaf pans: Easy to unmold and ideal for gifting or portioning.
🧊 How to Make This Ice Cream (Step-by-Step)
Making rich, creamy ice cream at home doesn’t have to be complicated. With just a few bowls, a bit of mixing, and some freezer time, you’ll have a homemade dessert that looks impressive and tastes even better. Here’s exactly how to do it:
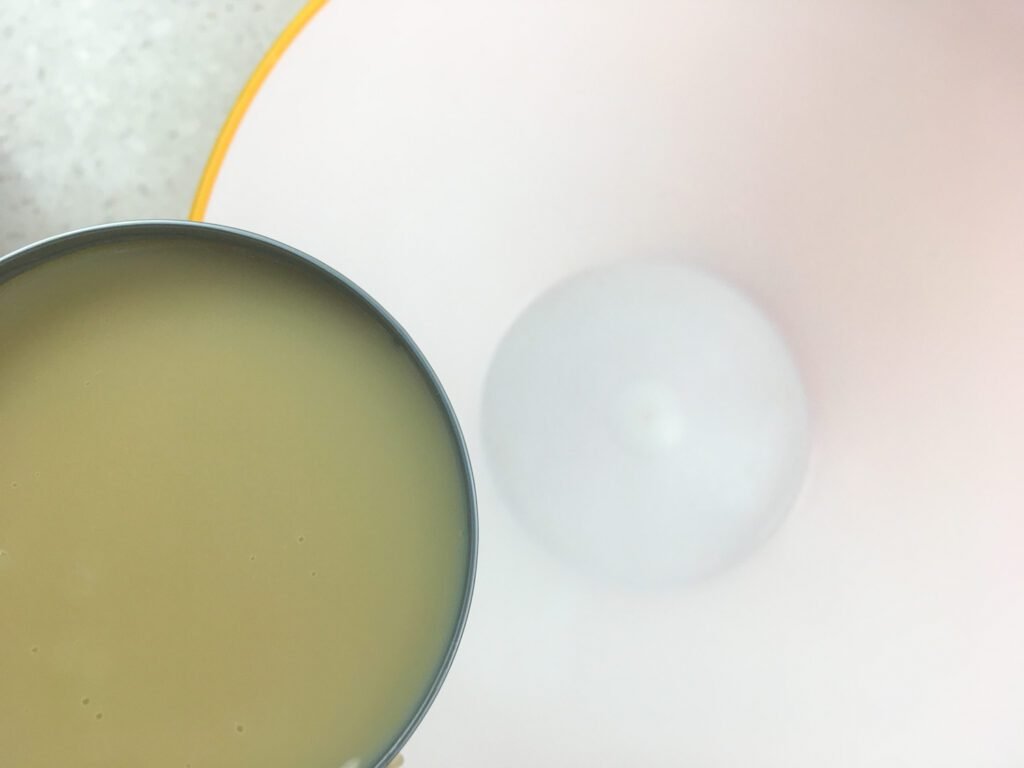
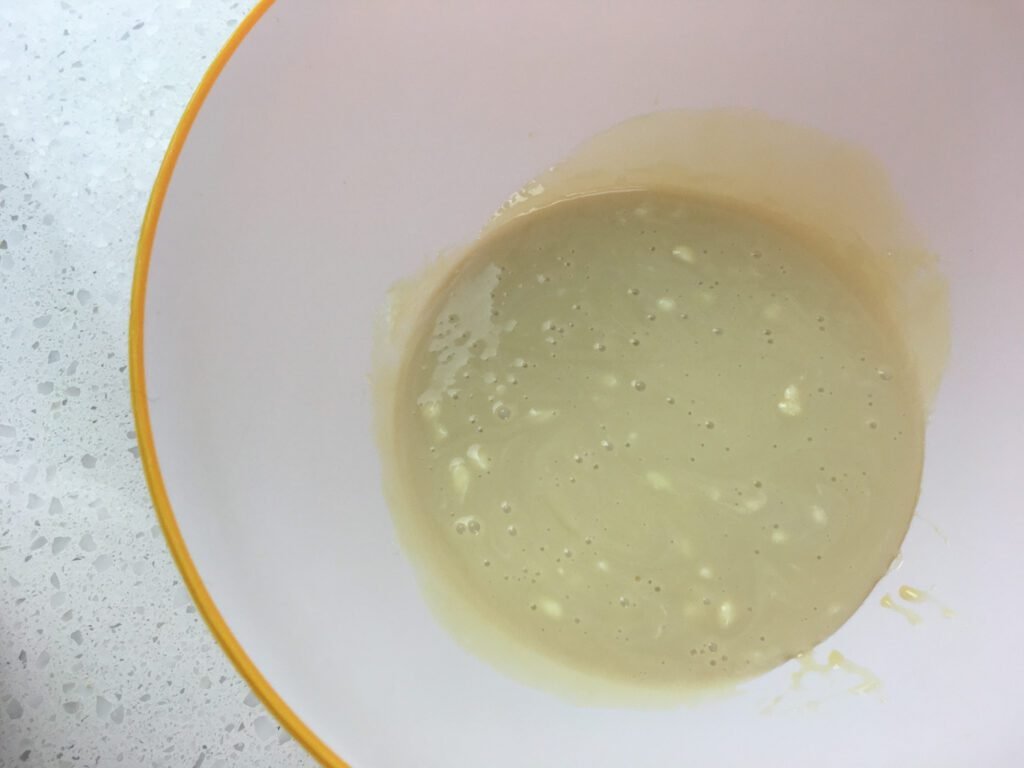
Step 1: Make the Chocolate Syrup (⏱️ ~5 minutes + cooling time)
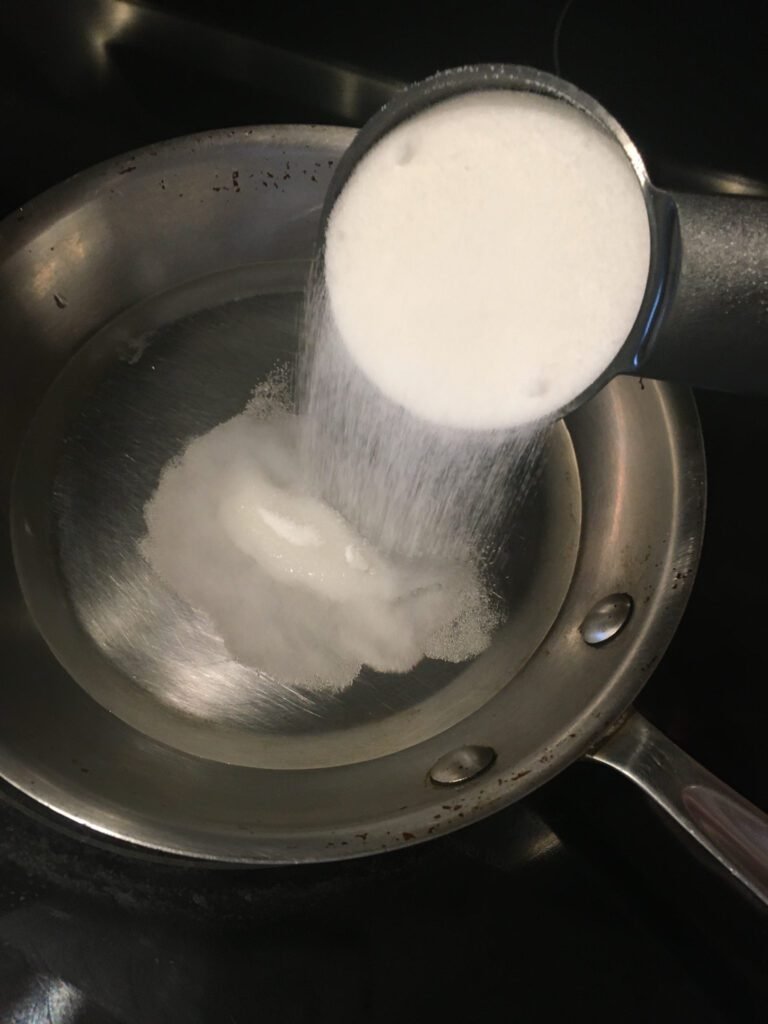
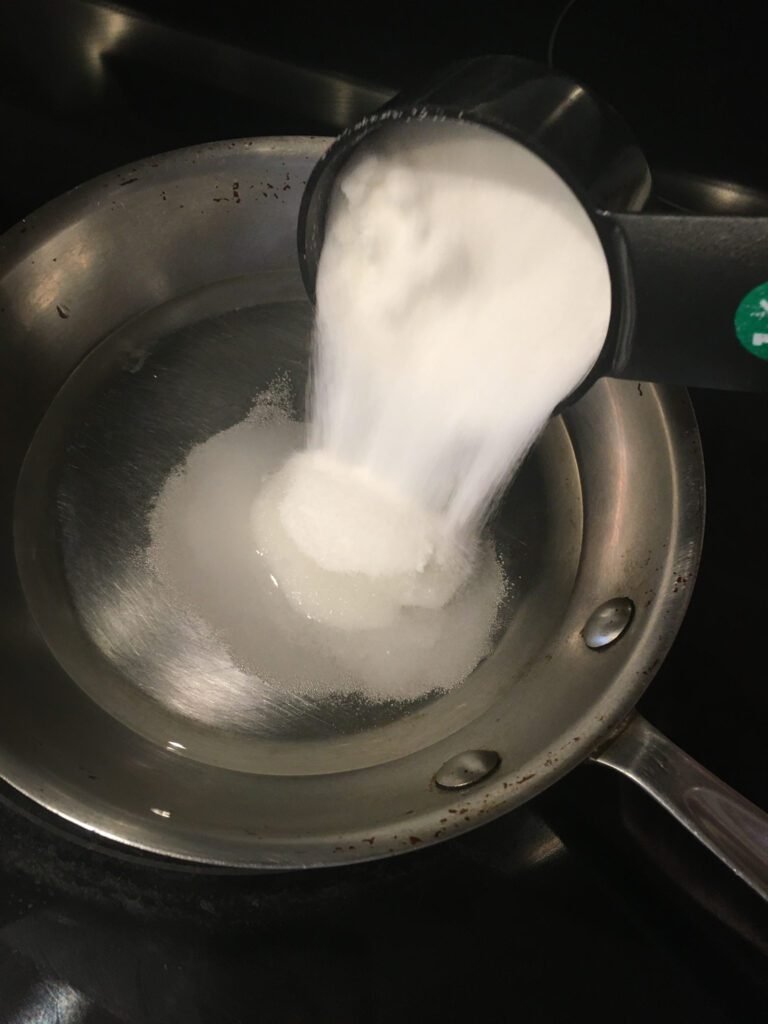
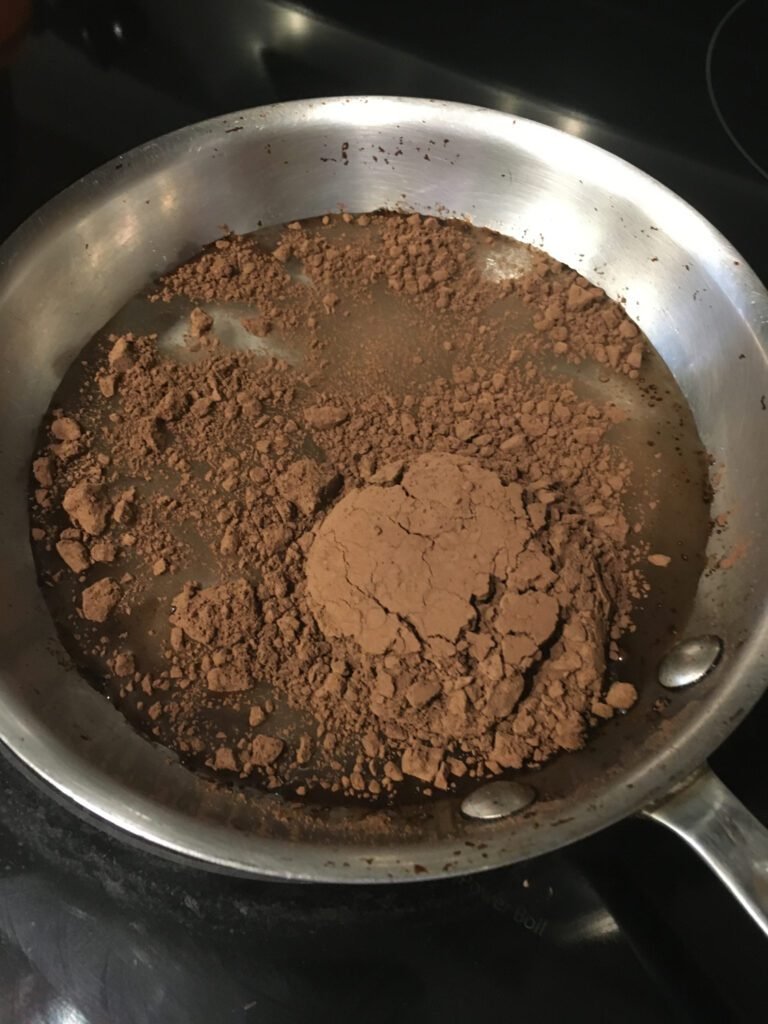
- In a small skillet or saucepan, combine water.
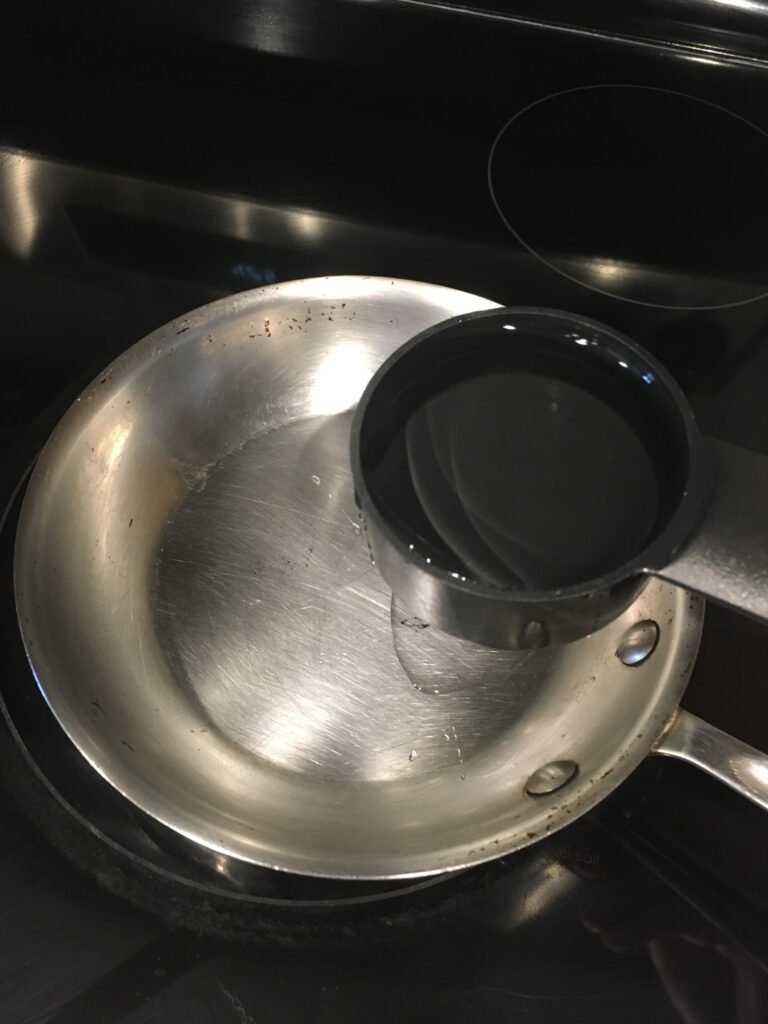
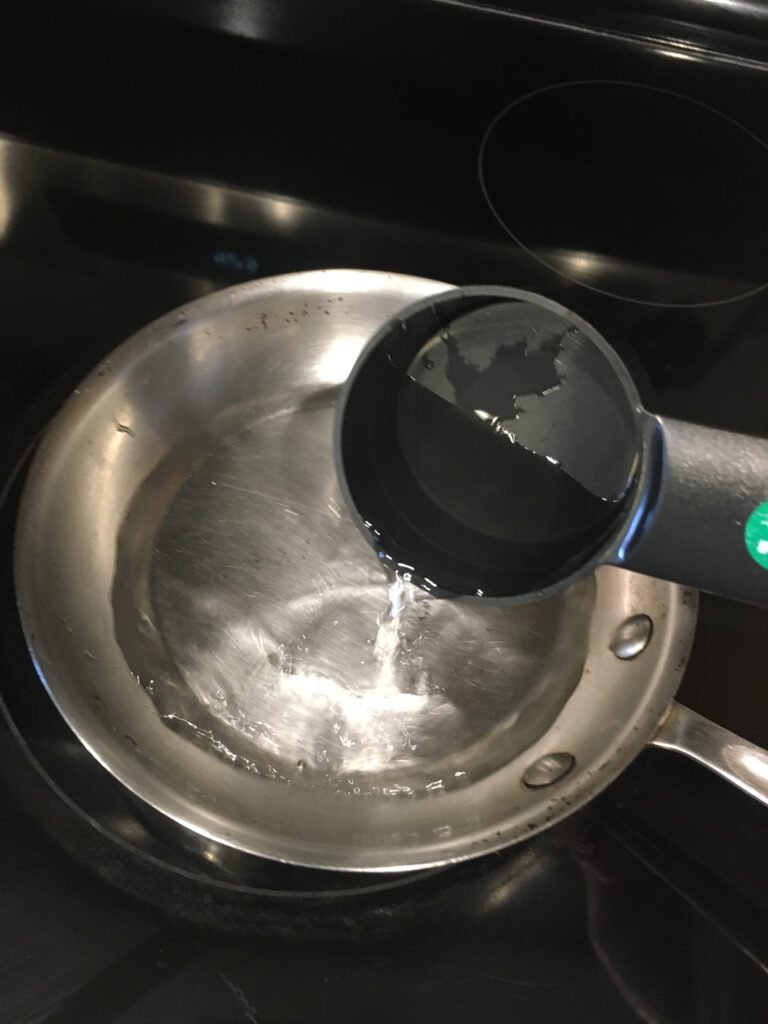
- White sugar.

- Unsweetened dark cocoa powder.

- Real vanilla extract.
- A pinch of salt.

- Whisk everything together over medium heat until smooth, glossy, and fully dissolved, about 2 to 3 minutes.

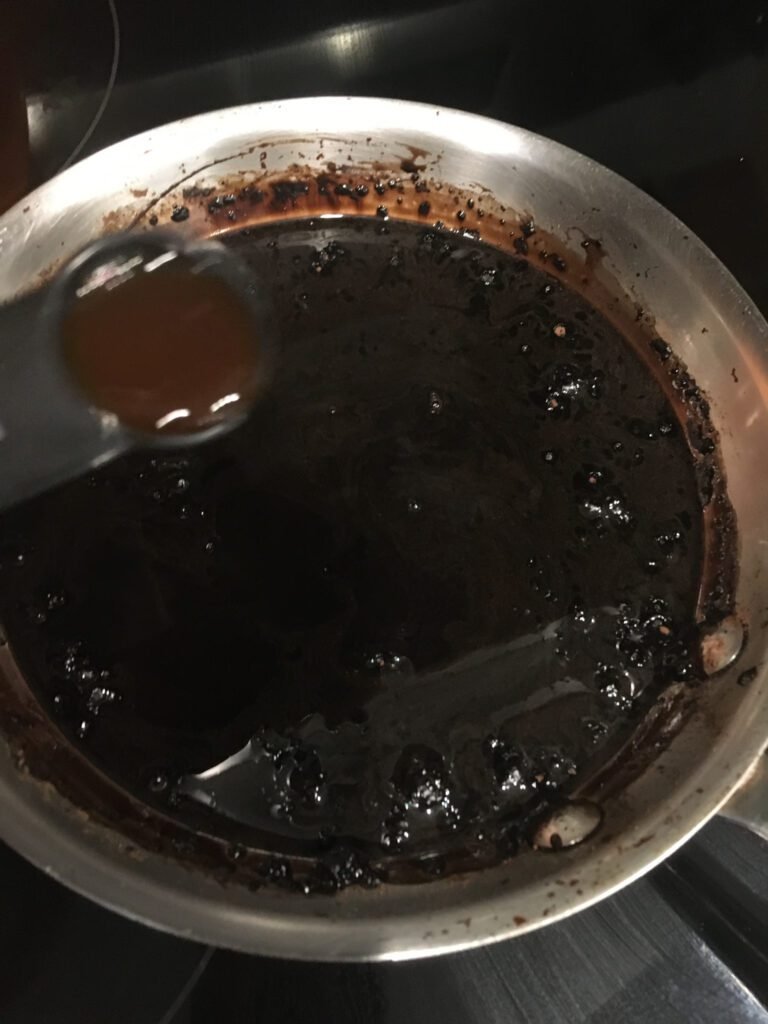
- Remove from heat and let the syrup cool completely at room temperature.
- Once cooled, transfer it to an airtight container and refrigerate until chilled. This step ensures the syrup doesn’t melt the whipped cream later on.
🔥 Pro Tip: Make this syrup a day ahead. Chilling it thoroughly gives you the best swirl and prevents your airy base from collapsing.
Step 2: Whip the Cream (⏱️ ~5 minutes)
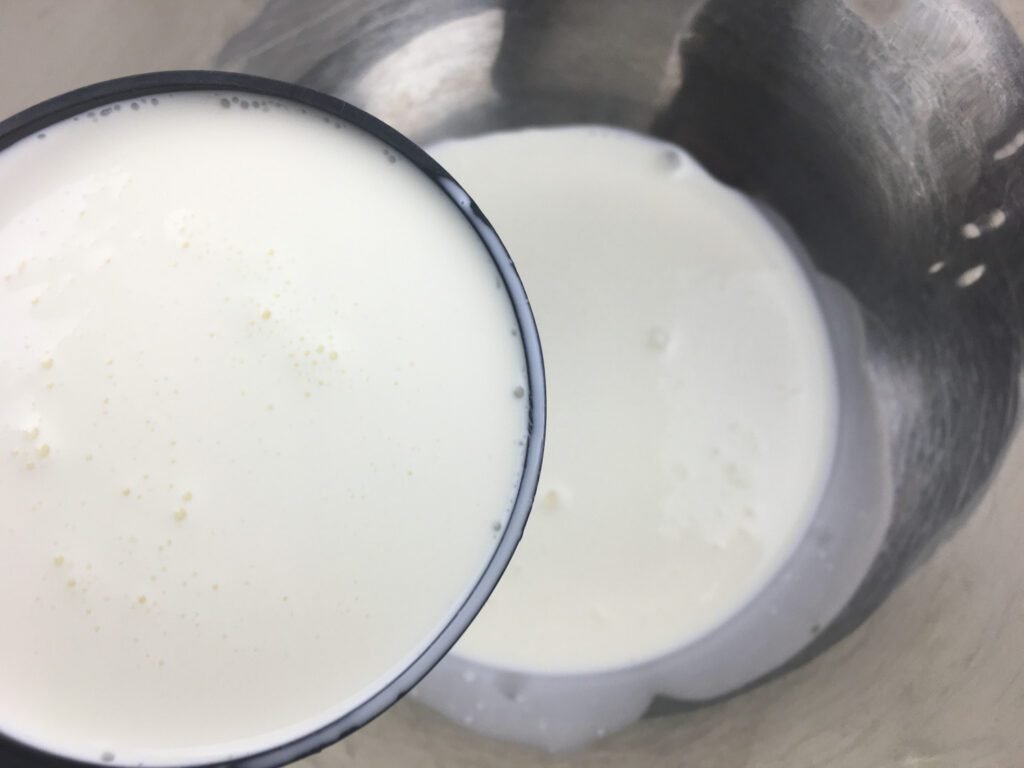
- Pour cold heavy cream into a large mixing bowl.
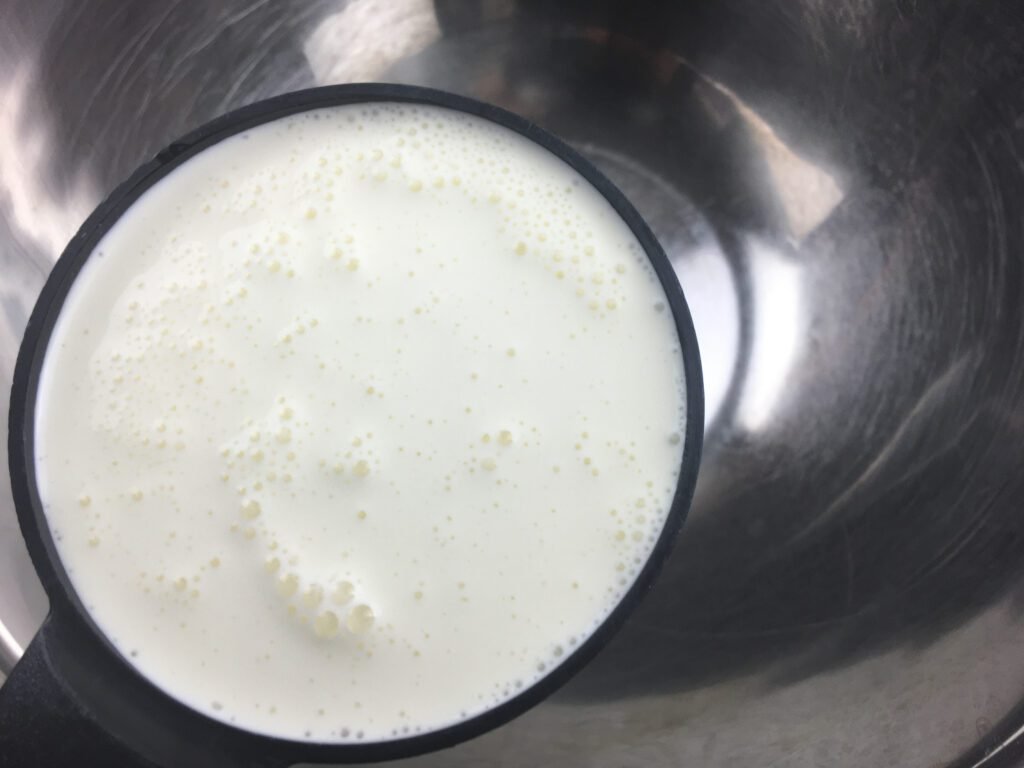

- Using a hand mixer or stand mixer, beat on high speed until you achieve stiff peaks. The cream should hold its shape when you lift the beaters, but still look soft and pillowy. Not grainy.
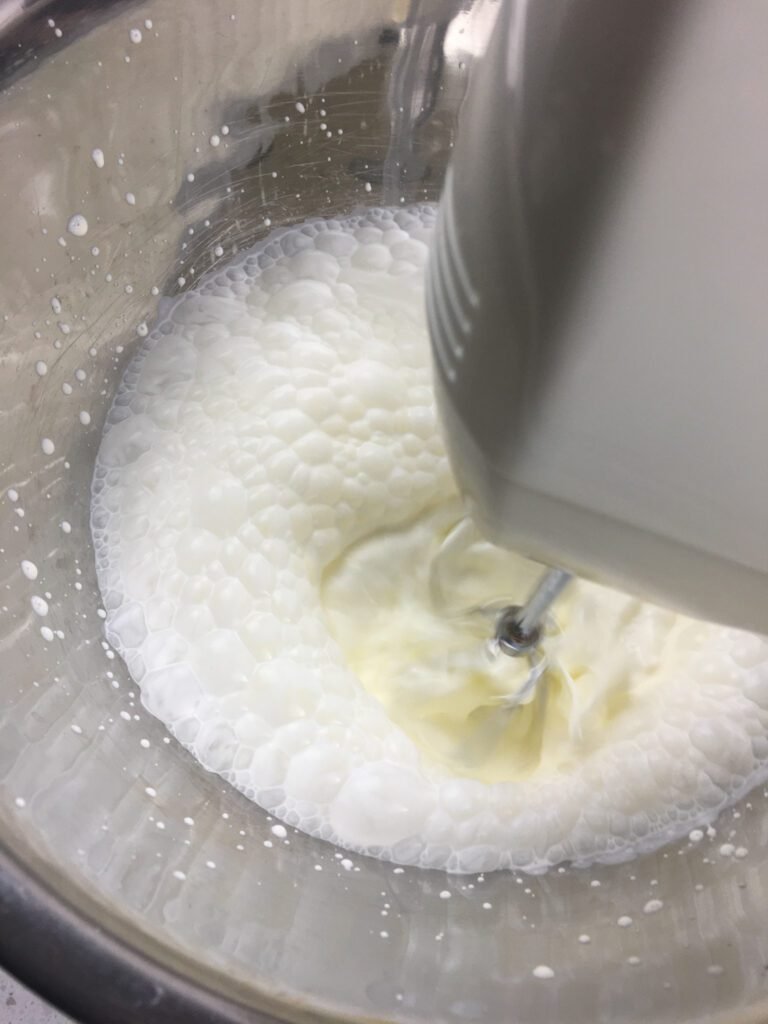
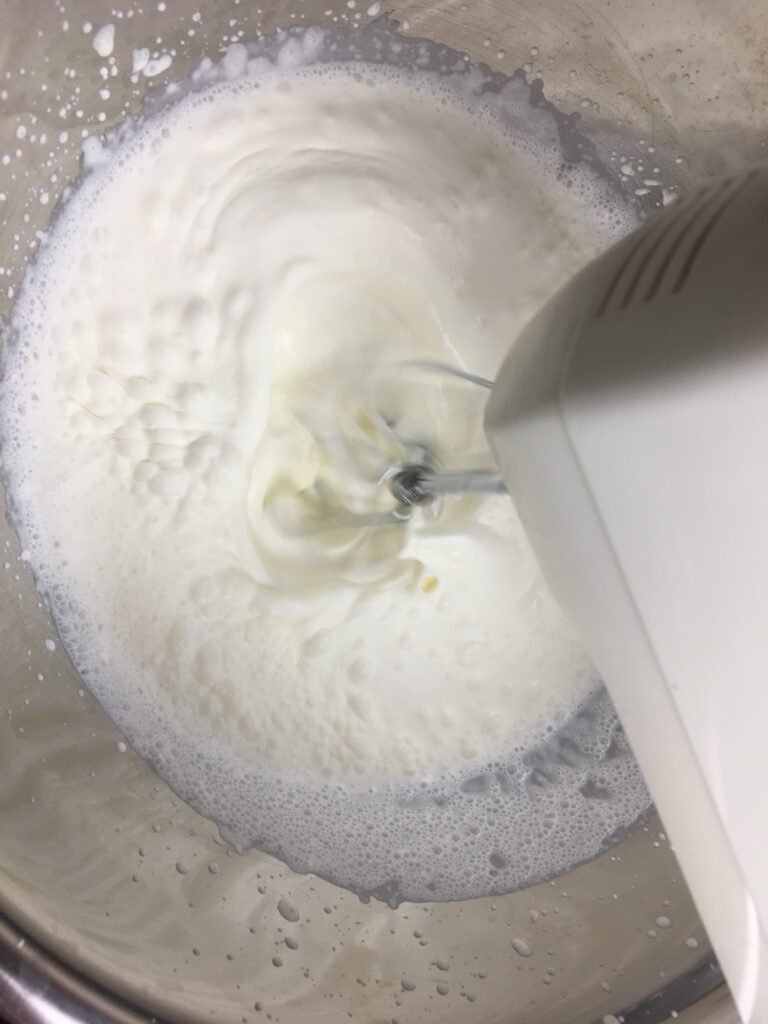
- Use a spatula to scrape down the sides of the bowl so everything is evenly whipped.

🎯 Visual cue: When you see distinct ripples and the cream stands tall on the beaters—stop! Over-whipping will turn it grainy or buttery.
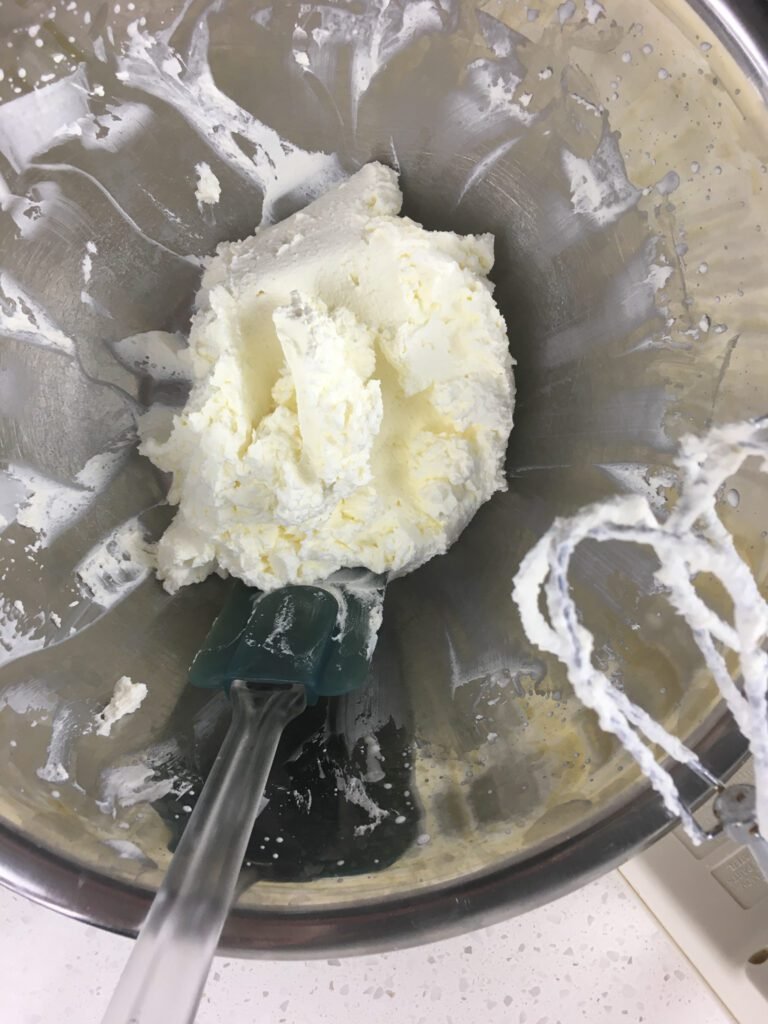
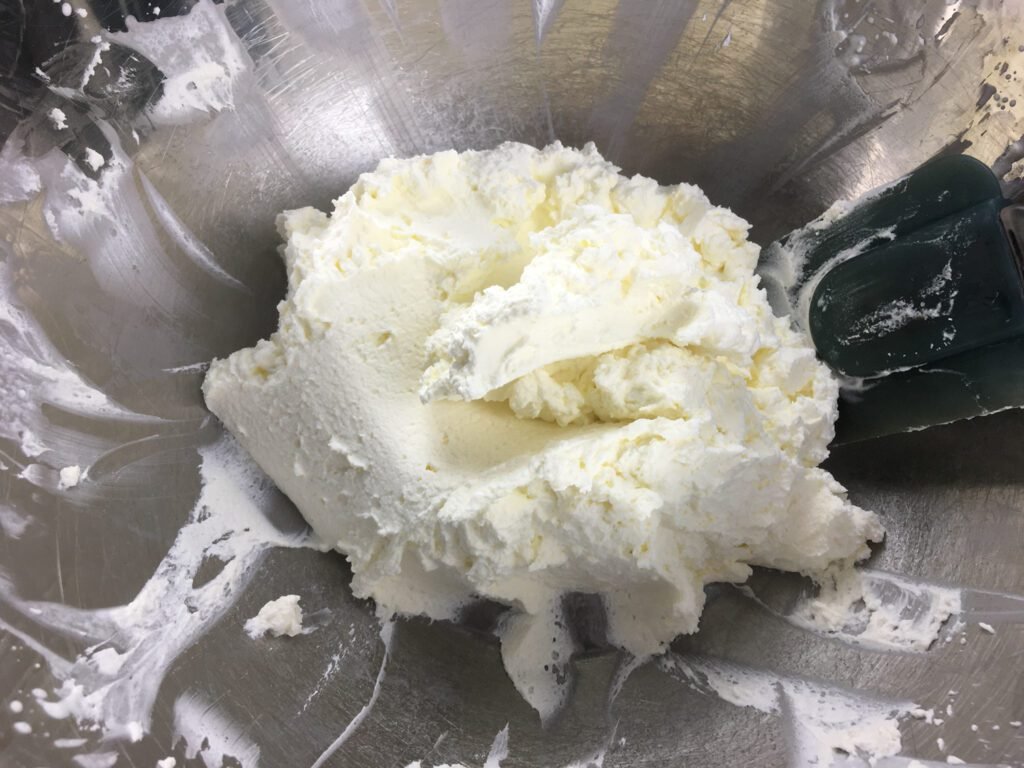
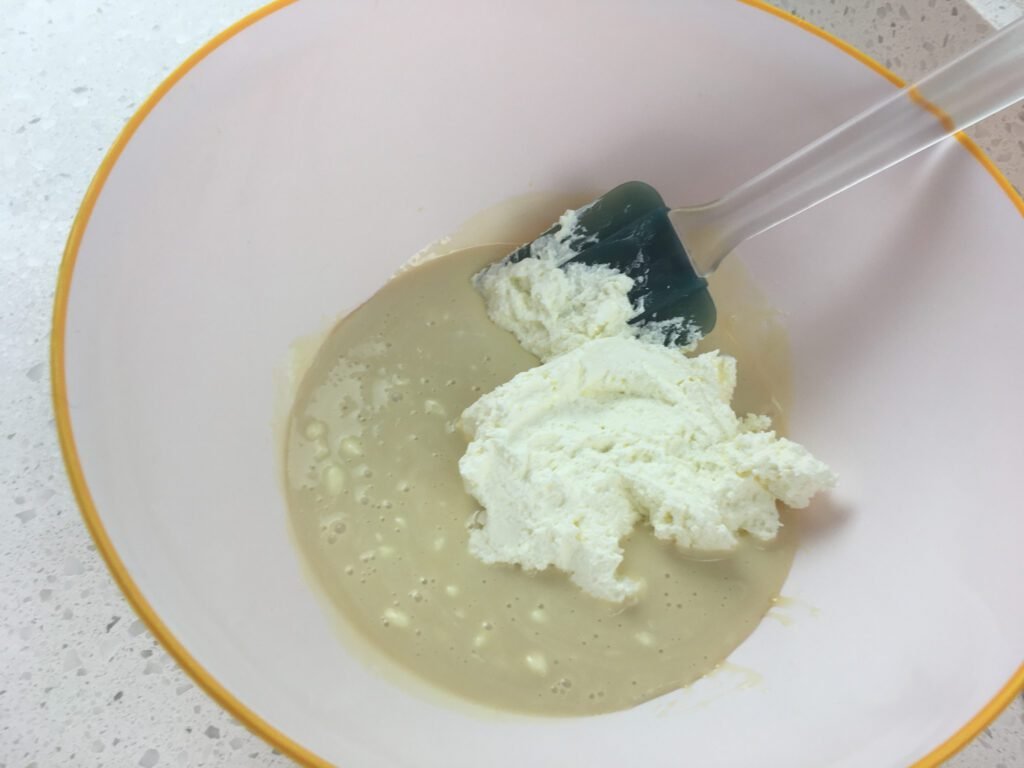
Step 3: Build the Ice Cream Base (⏱️ ~5 minutes)
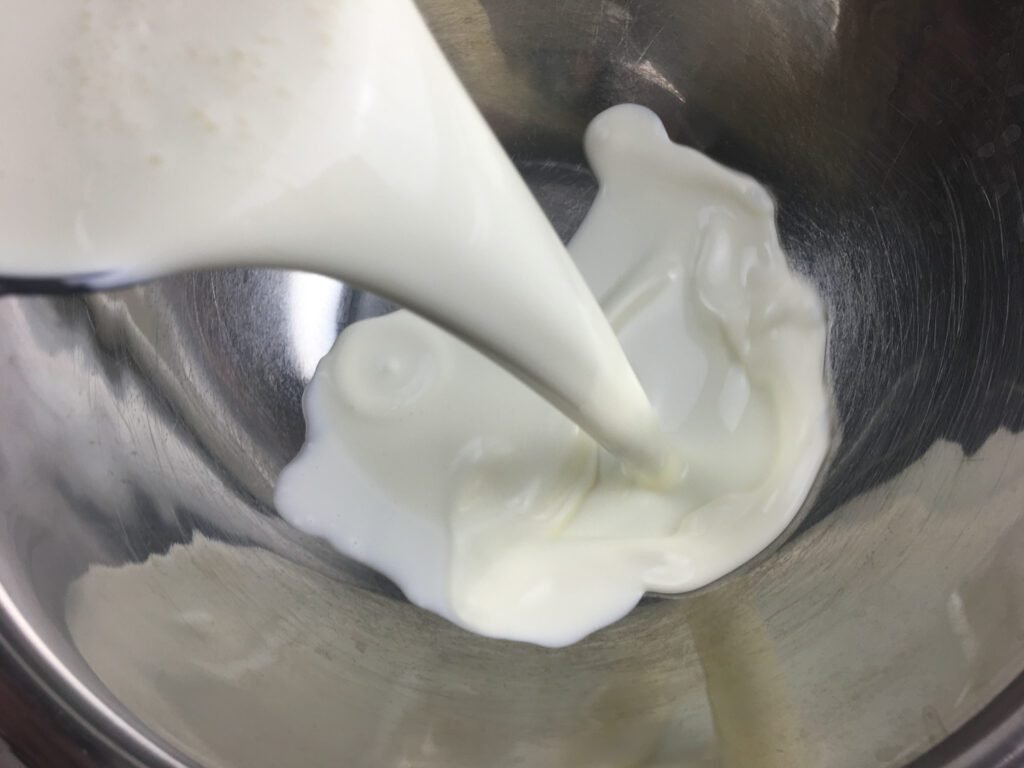
- In a separate bowl, combine the sweetened condensed milk.
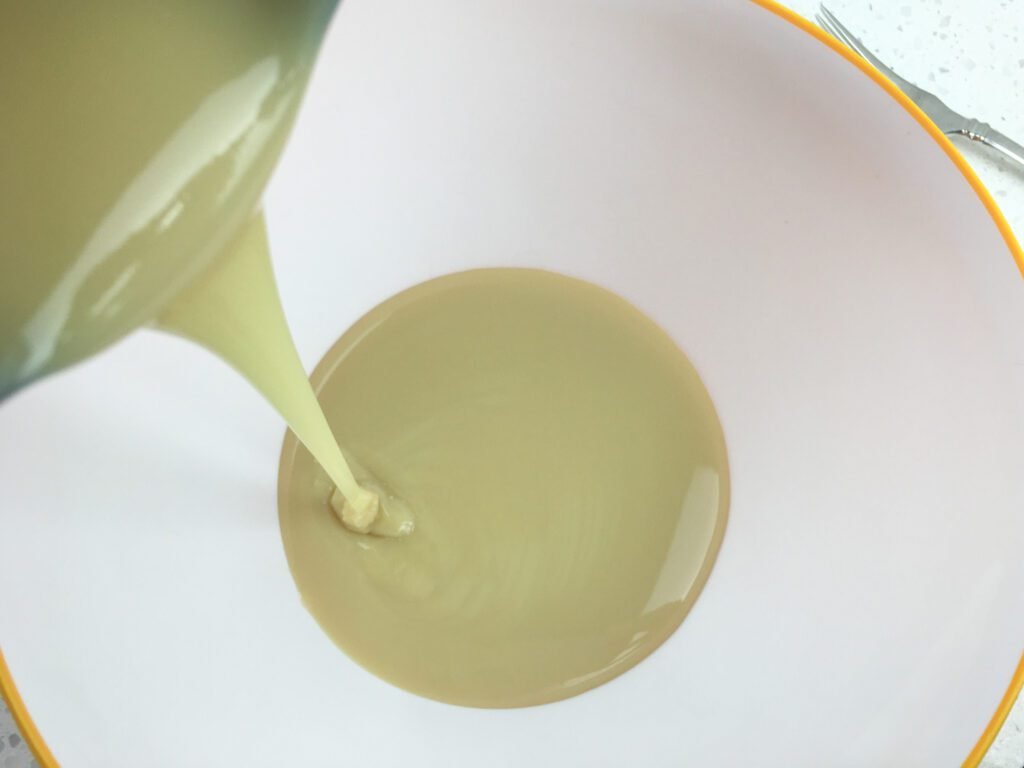
- Vanilla extract.
- Stir gently until well mixed.
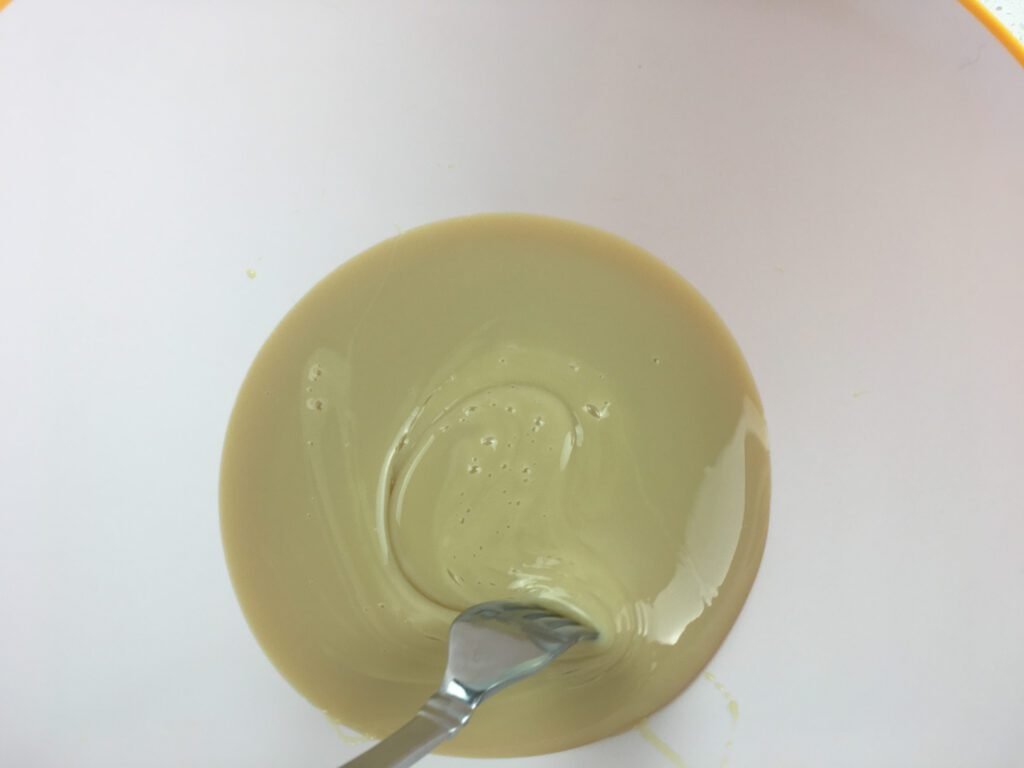
- To keep the whipped cream from deflating, start by folding in just a scoop of the whipped cream into the condensed milk mixture. This “lightens” the base and makes it easier to combine.
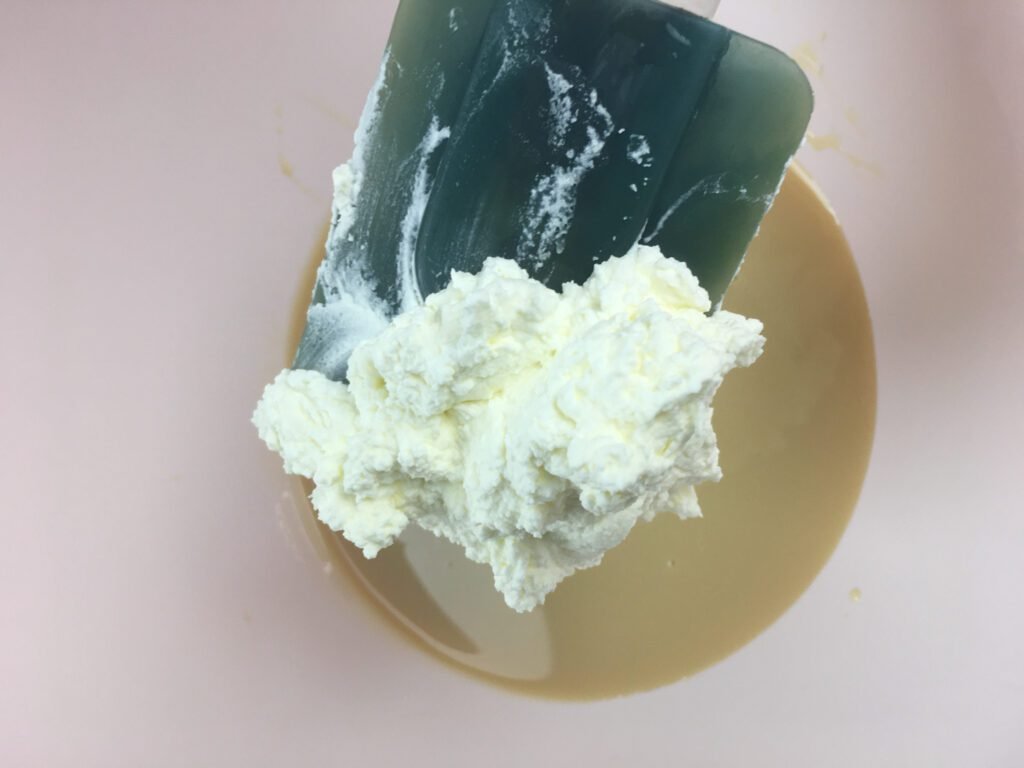

- Then, add the rest of the whipped cream and fold gently using a spatula.
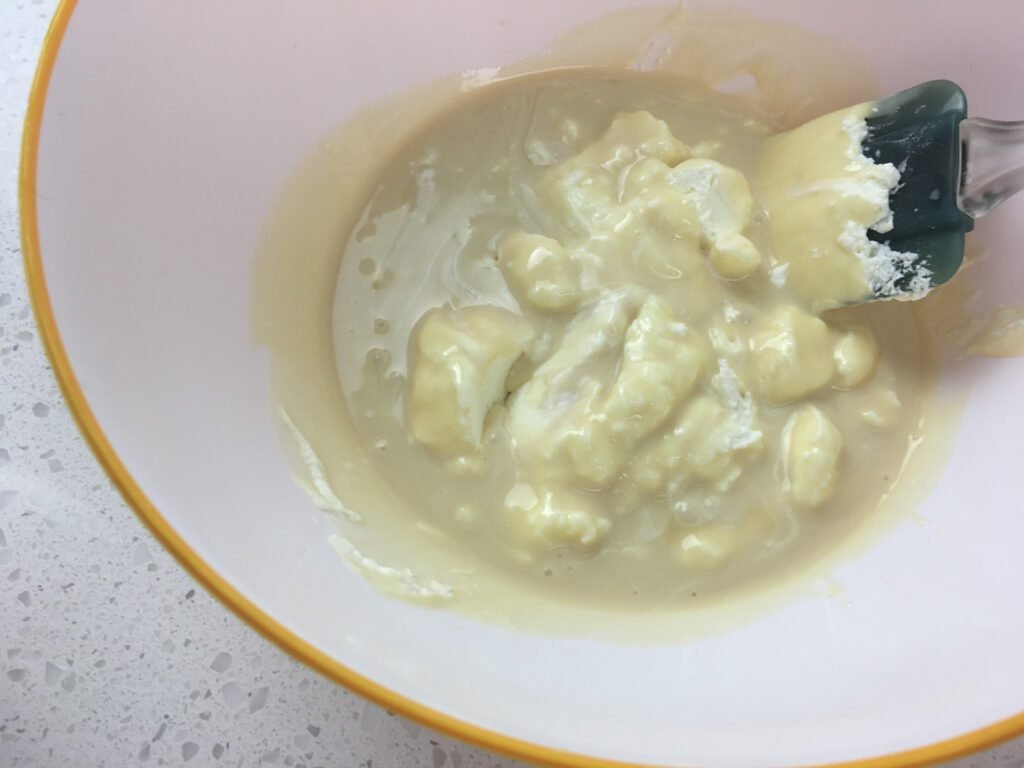
- Be patient here. Fold in wide, sweeping motions to maintain volume.
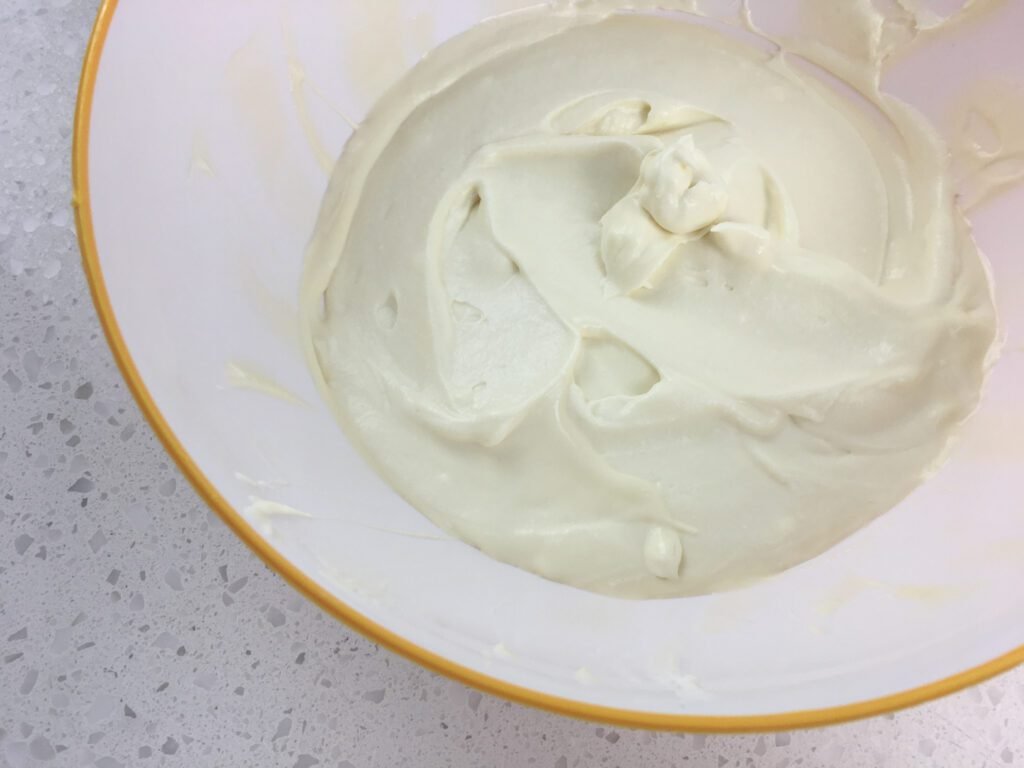
💡 Pro Tip: Folding is different from stirring. Use a light hand to preserve the air bubbles that give your ice cream its creamy texture.
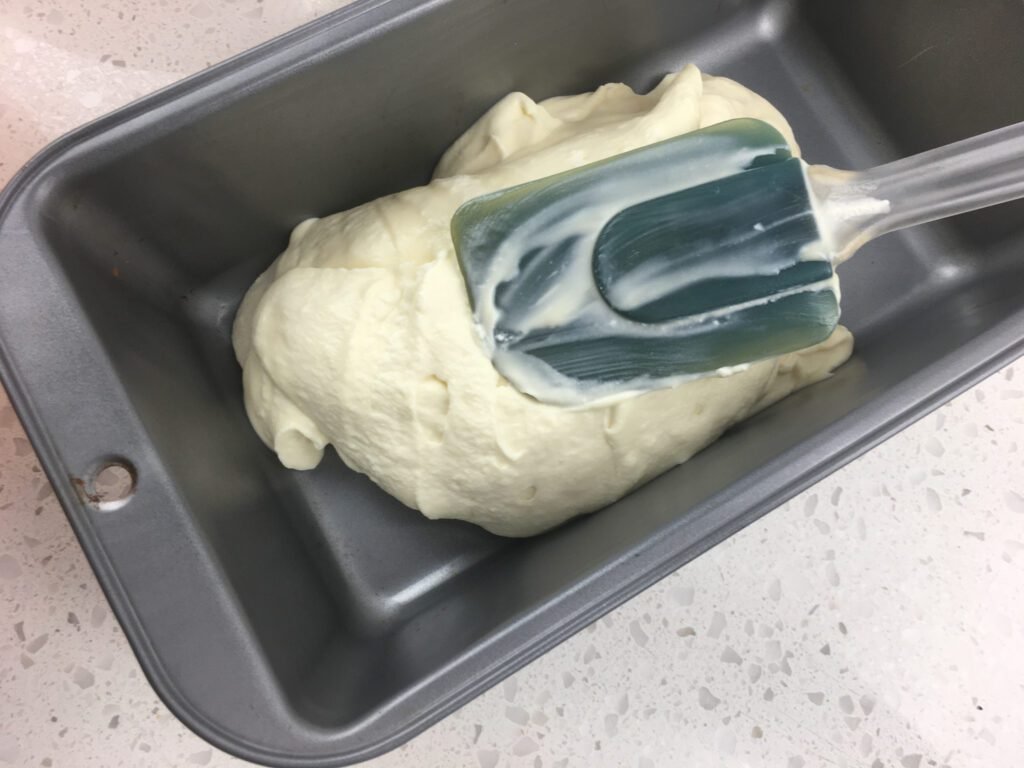
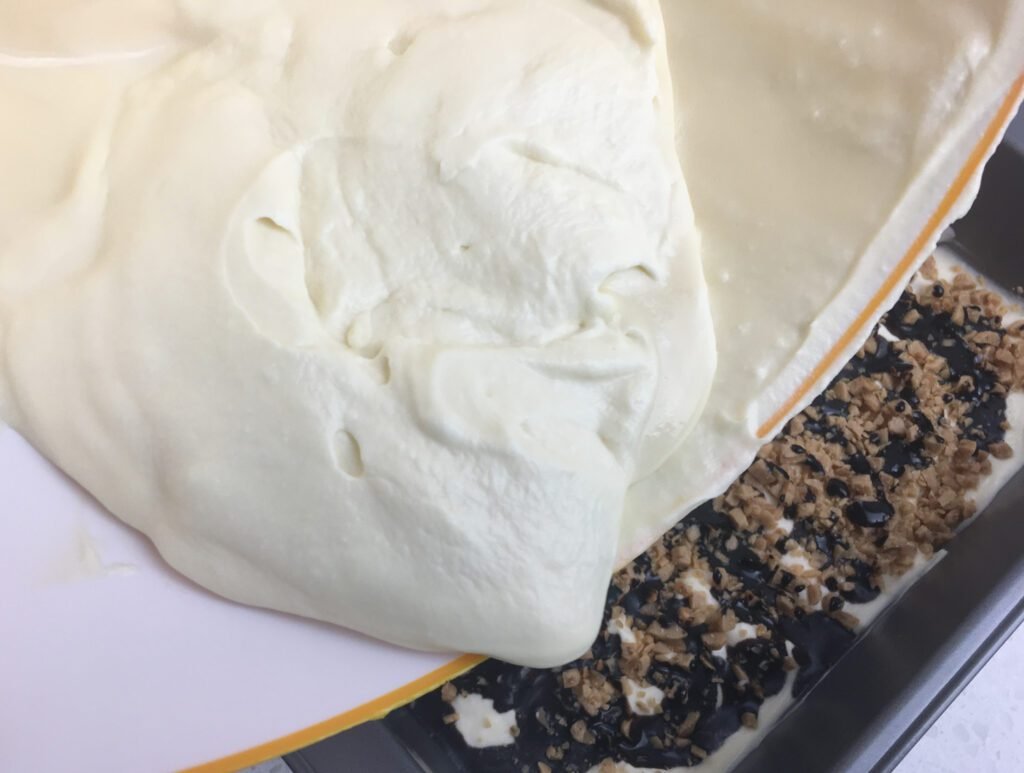
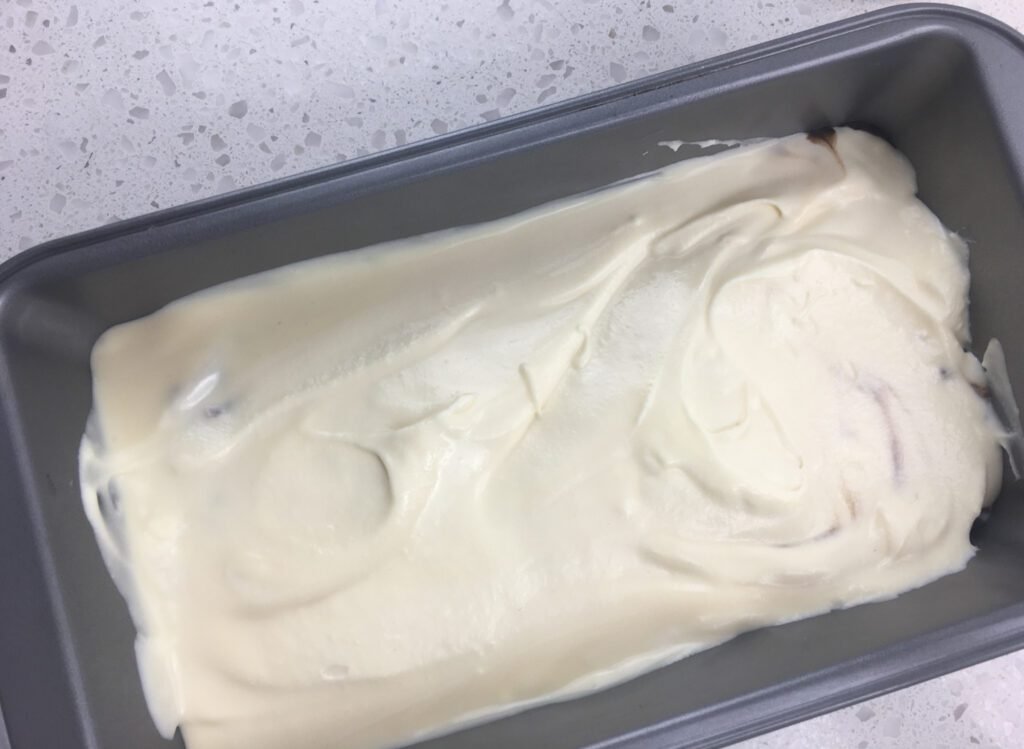
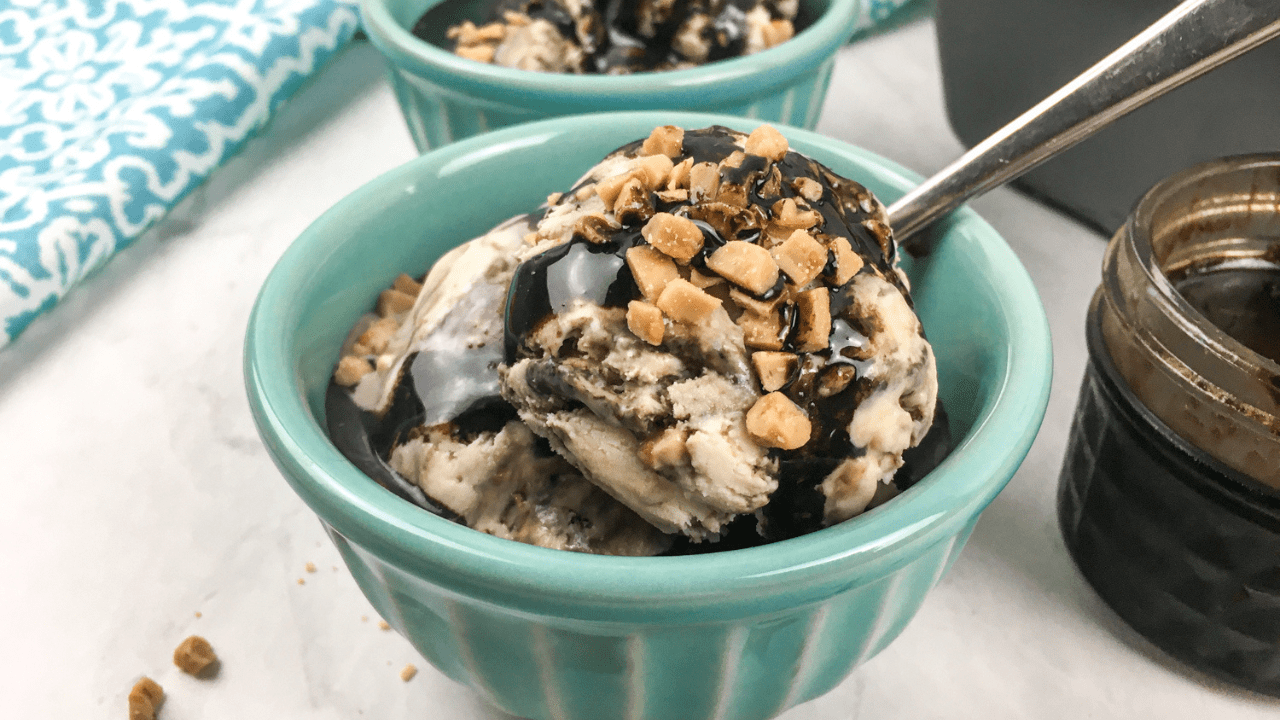
Step 4: Layer and Swirl (⏱️ ~5 minutes)
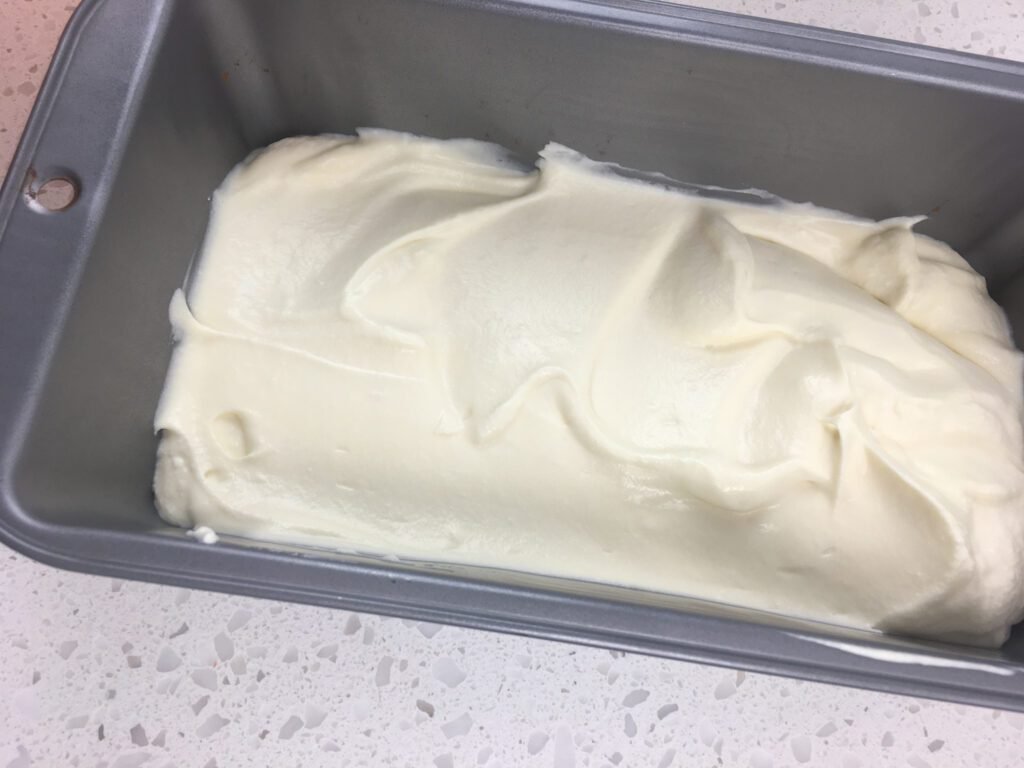
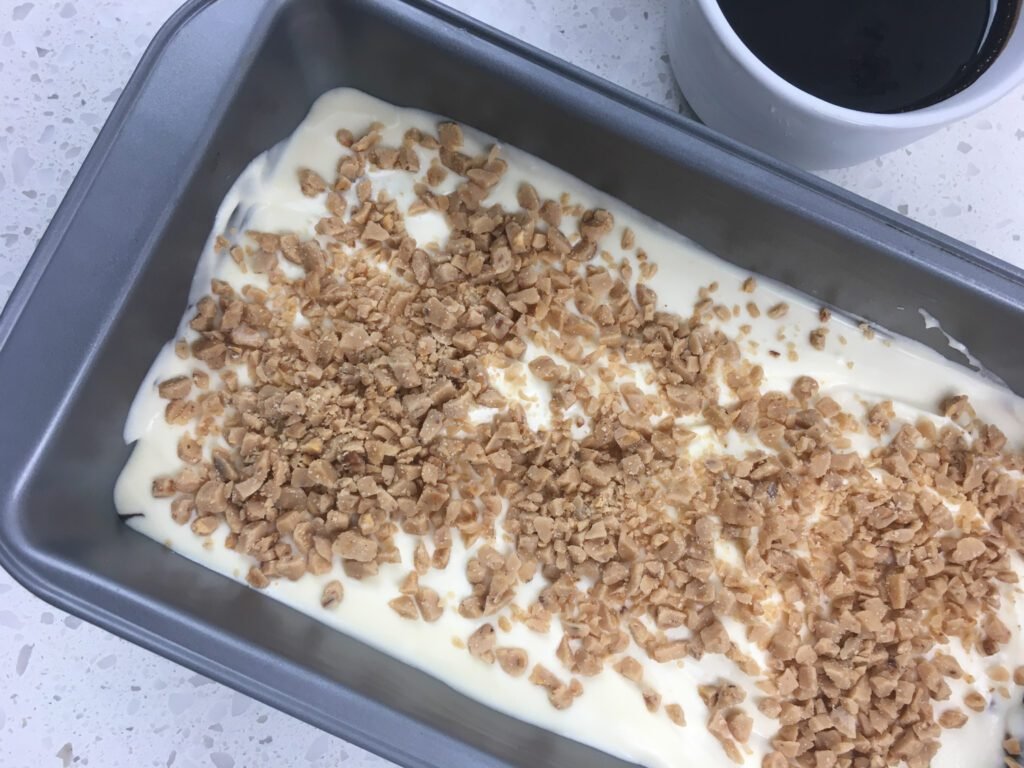
- Spoon half of the ice cream mixture into your 9×5 loaf pan.
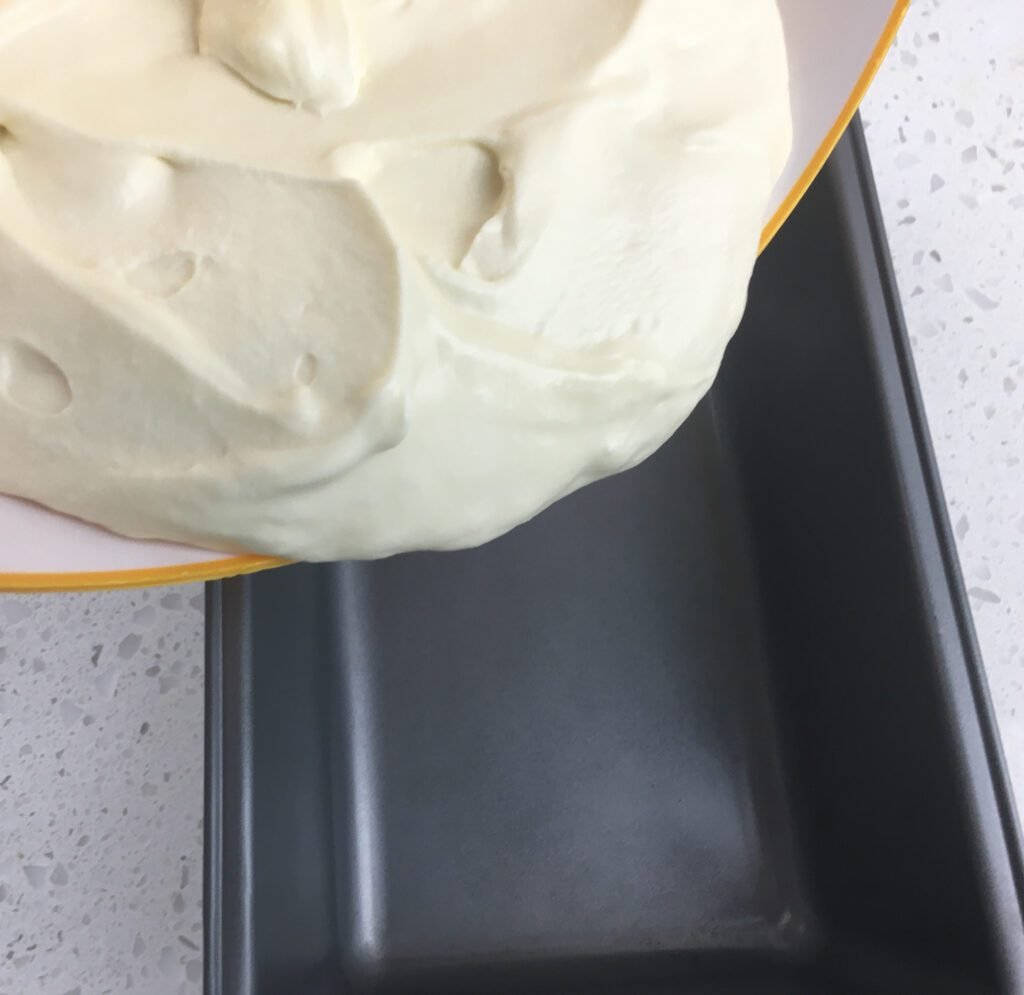
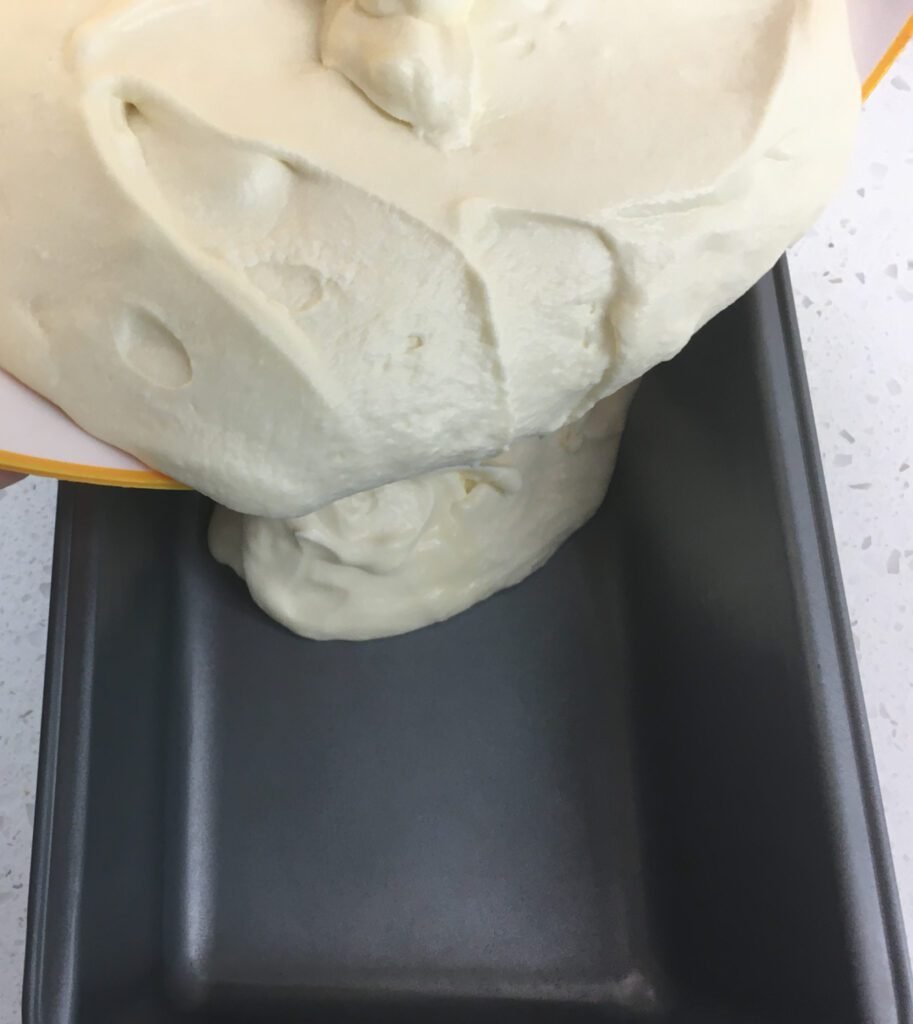
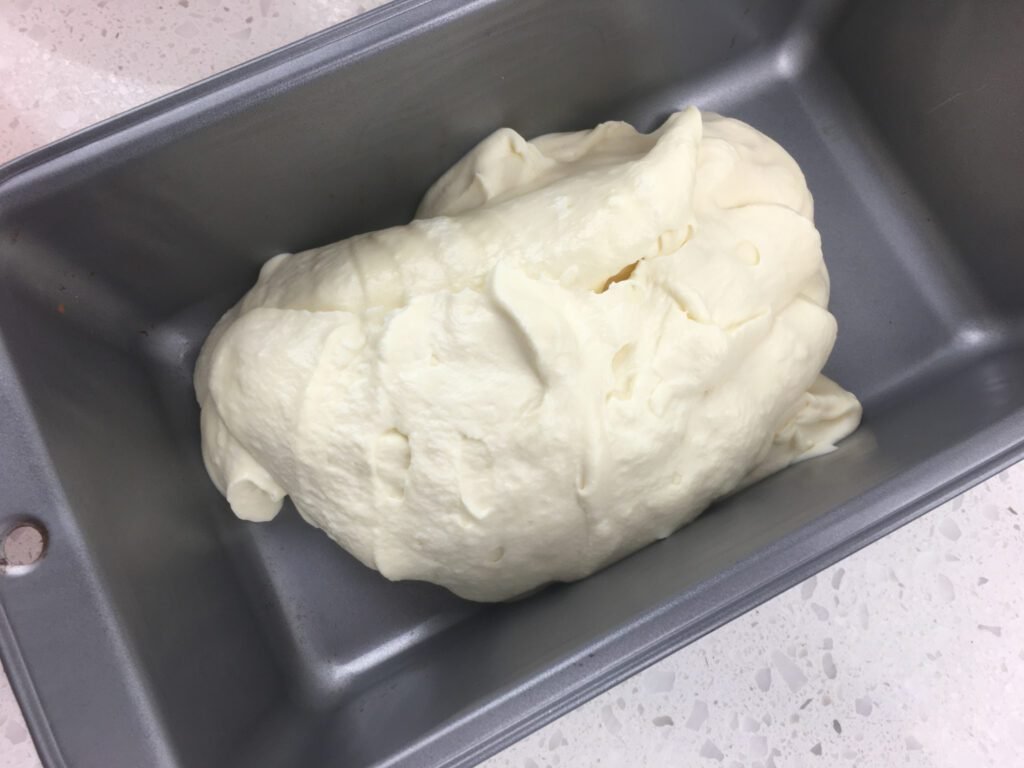
- Smooth the surface with your spatula.
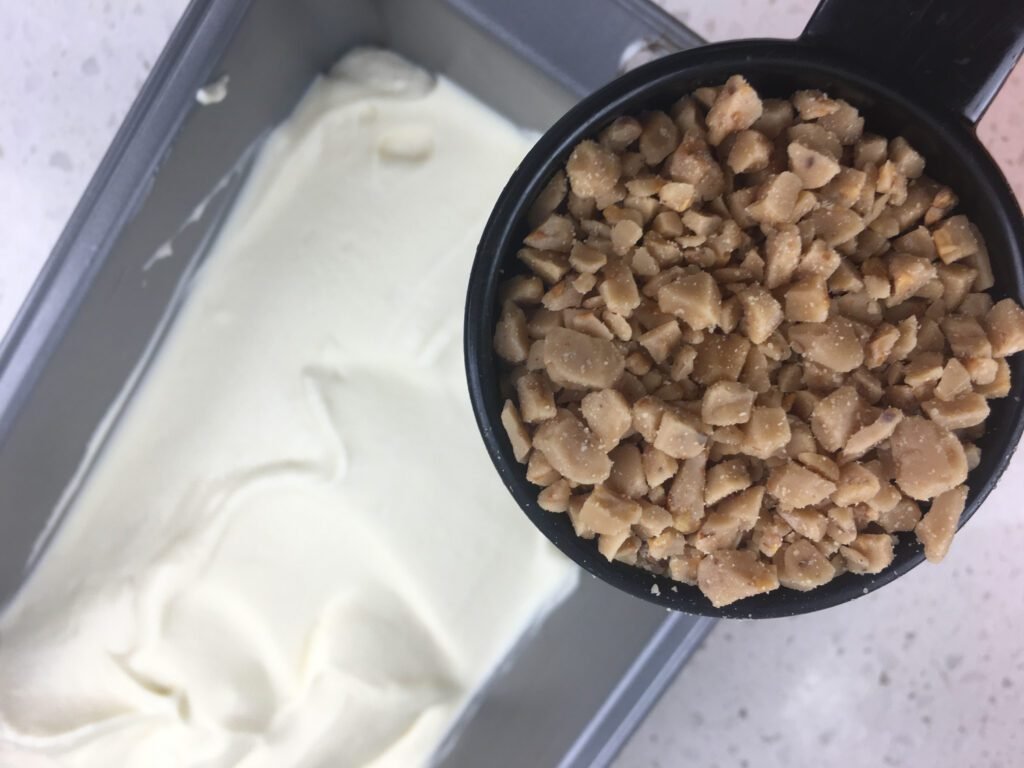
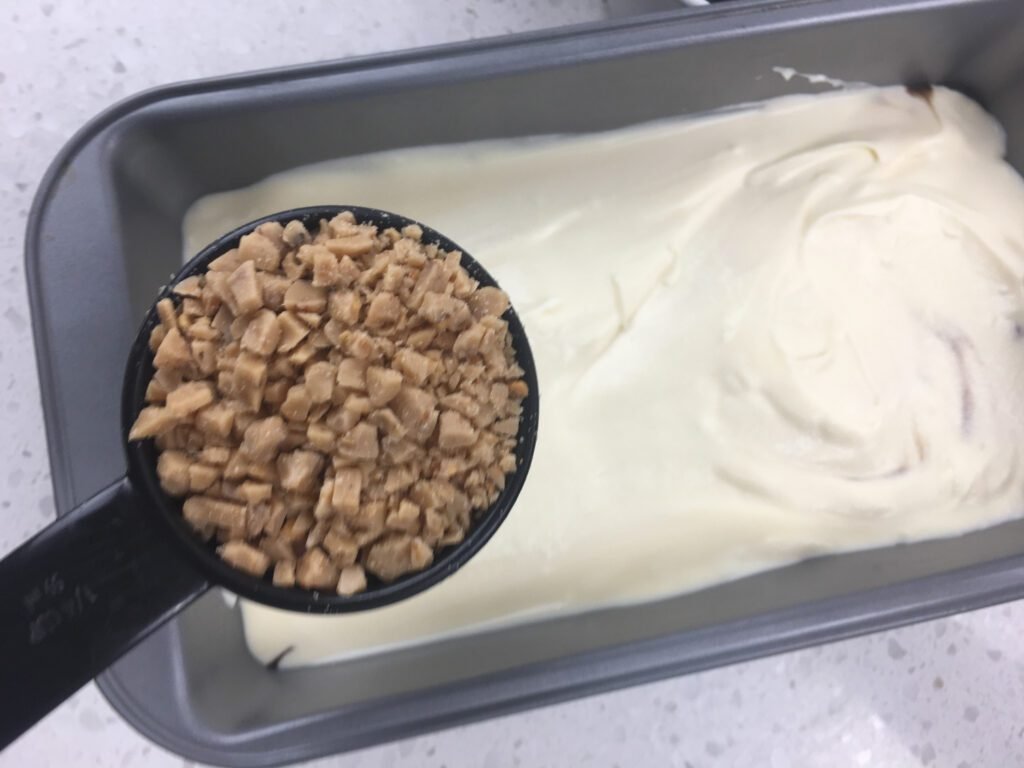
- Sprinkle half of the Heath toffee bits evenly over the surface.
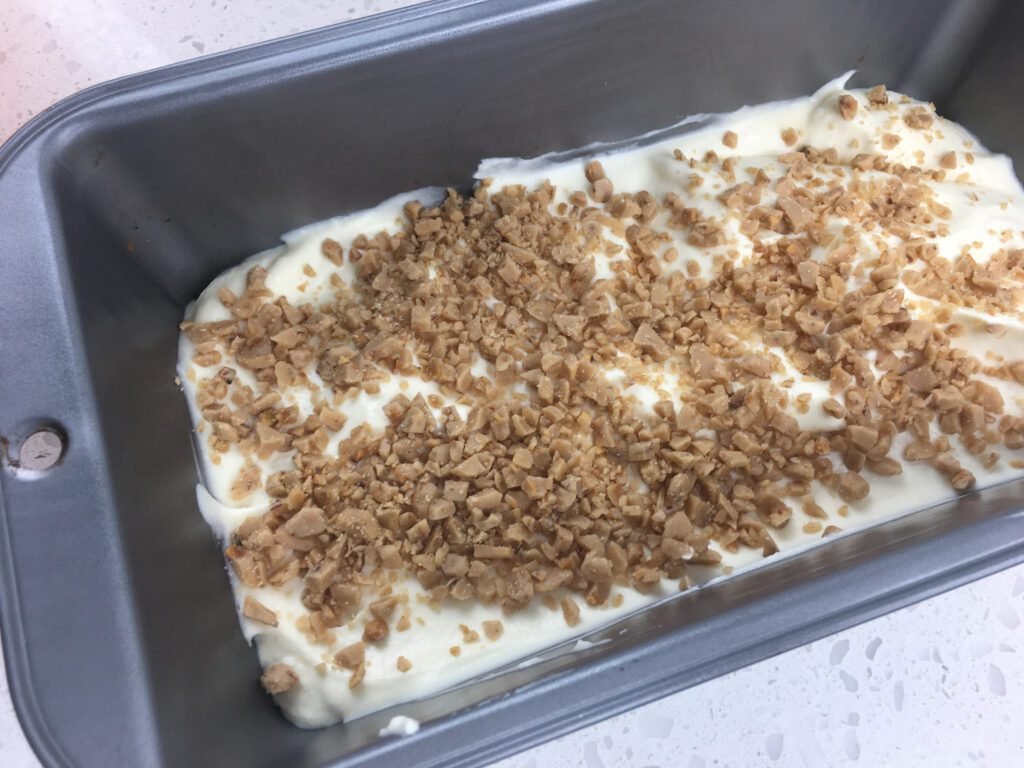
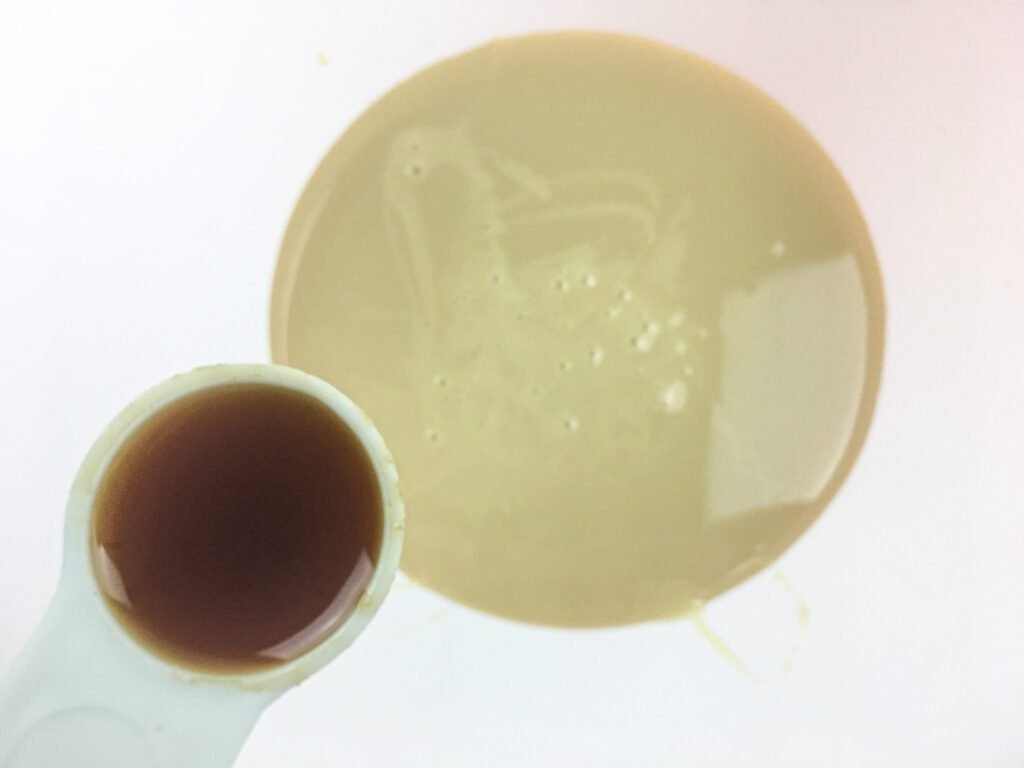
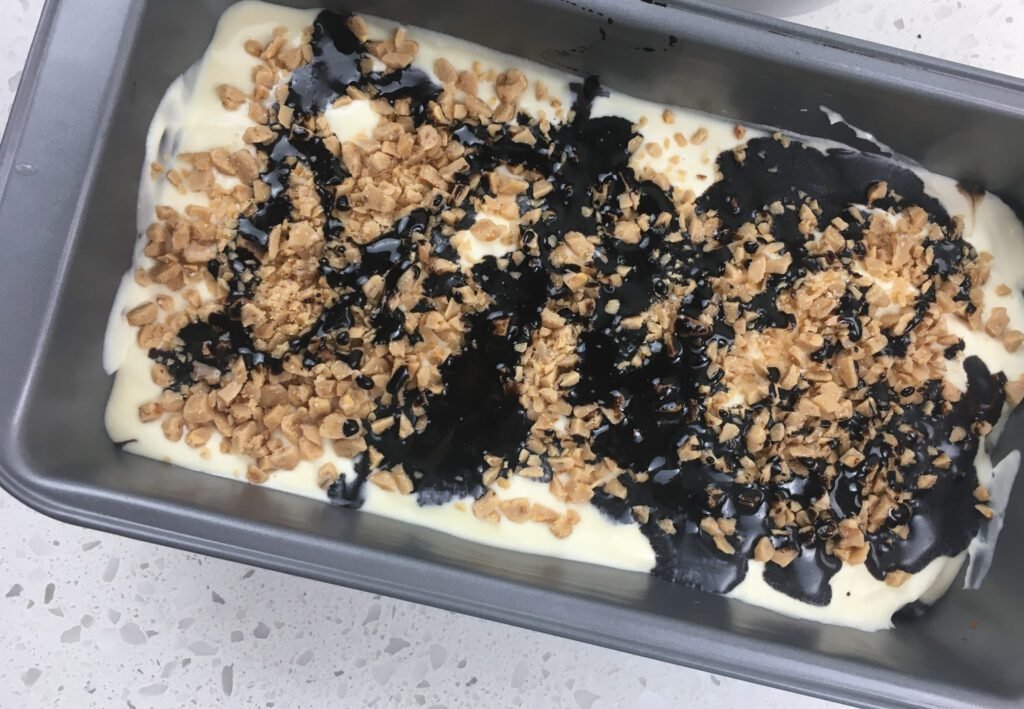
- Drizzle half of the chilled chocolate syrup in thin ribbons over the top.
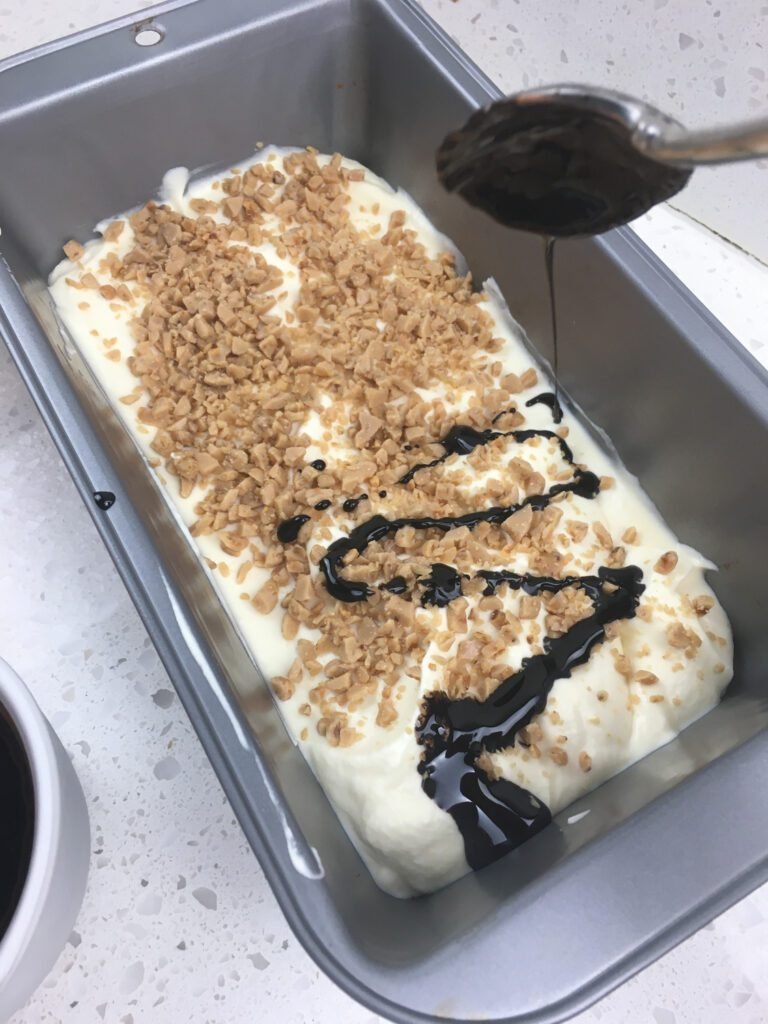
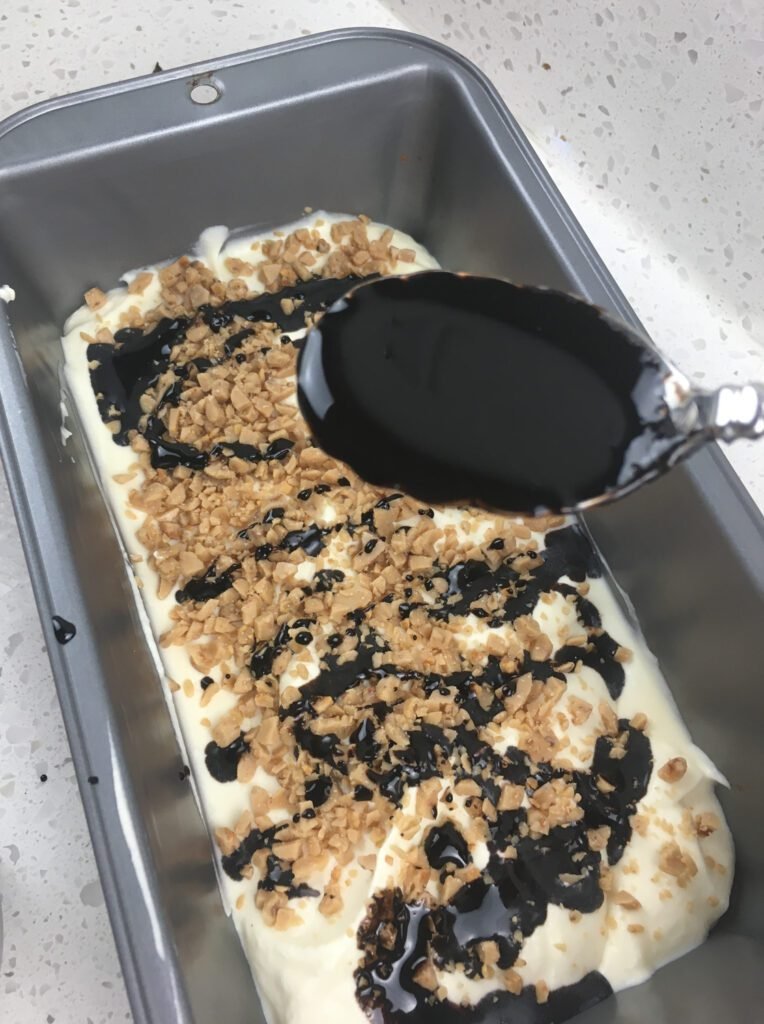

- Repeat: Add the remaining ice cream base, drizzle the rest of the syrup, and sprinkle the remaining toffee.
- Using a butter knife, insert it vertically at one end of the pan and gently swirl back and forth down the length of the pan to create a marbled effect.
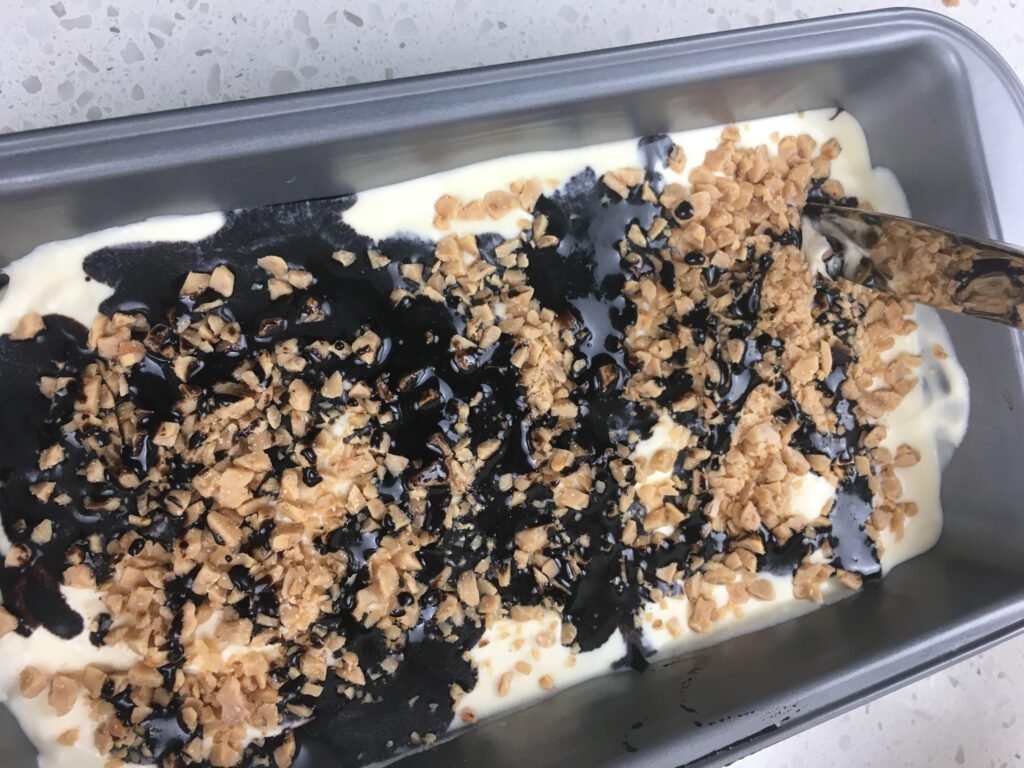
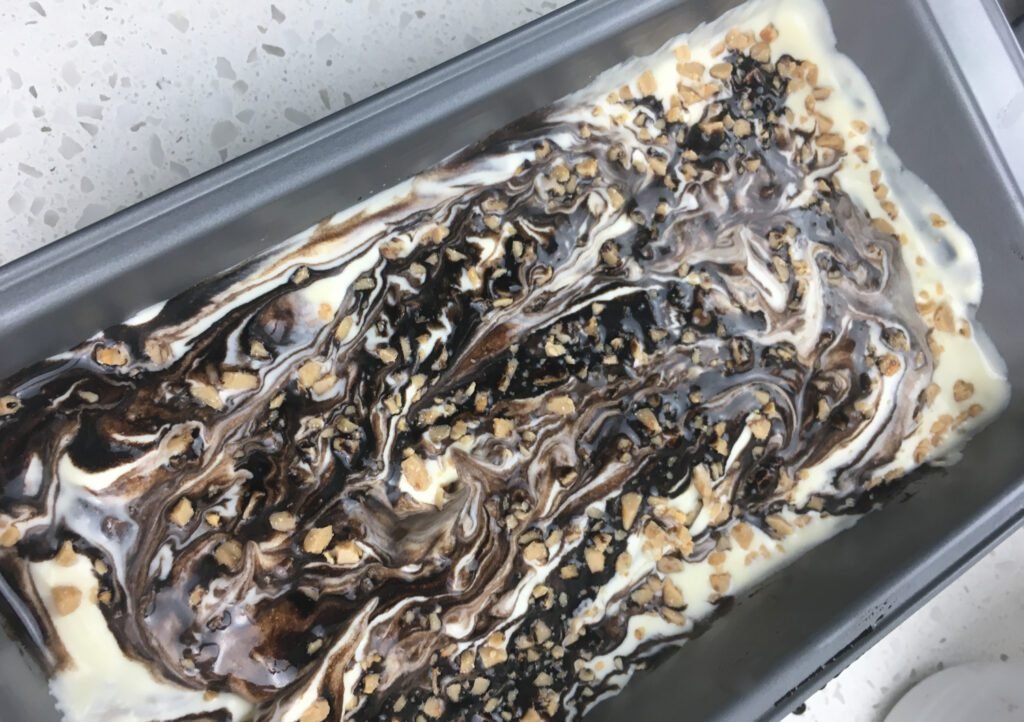
🍫 Pro Tip: Avoid over-swizzling. You want thick streaks and ribbons of chocolate, not an all-brown blend. Swirl once or twice, then stop.
Step 5: Freeze (⏱️ ~4+ hours or overnight)
- Cover the surface of the ice cream with plastic wrap, pressing it gently onto the surface to remove any air pockets.
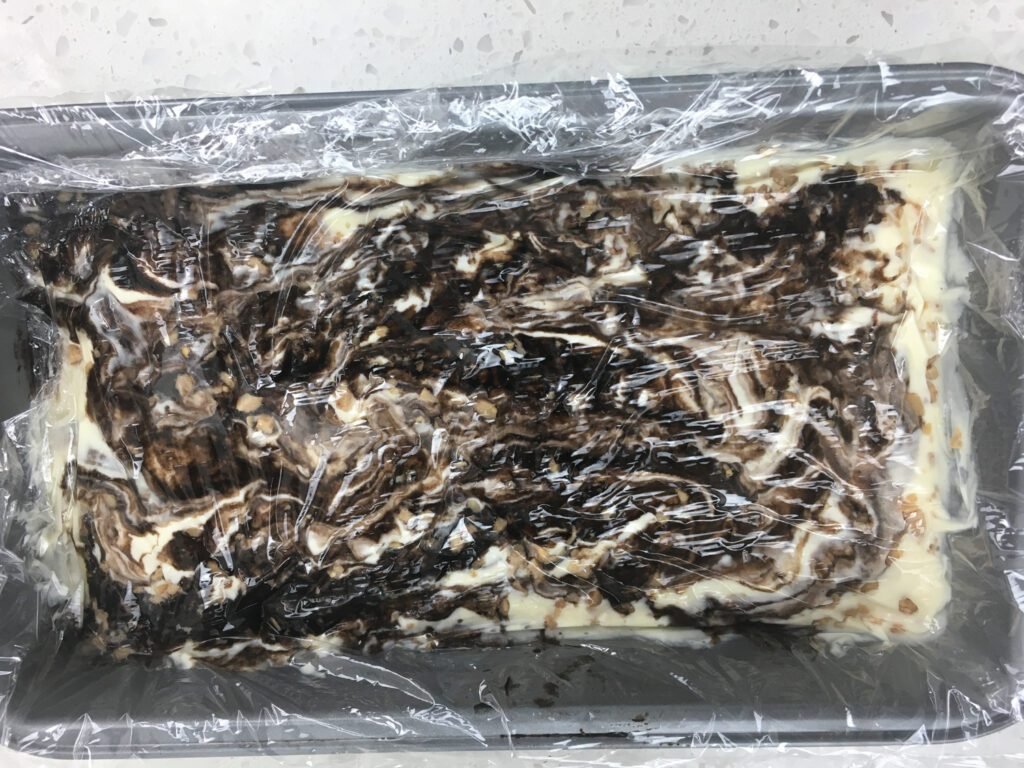
- Place the loaf pan flat in the freezer.
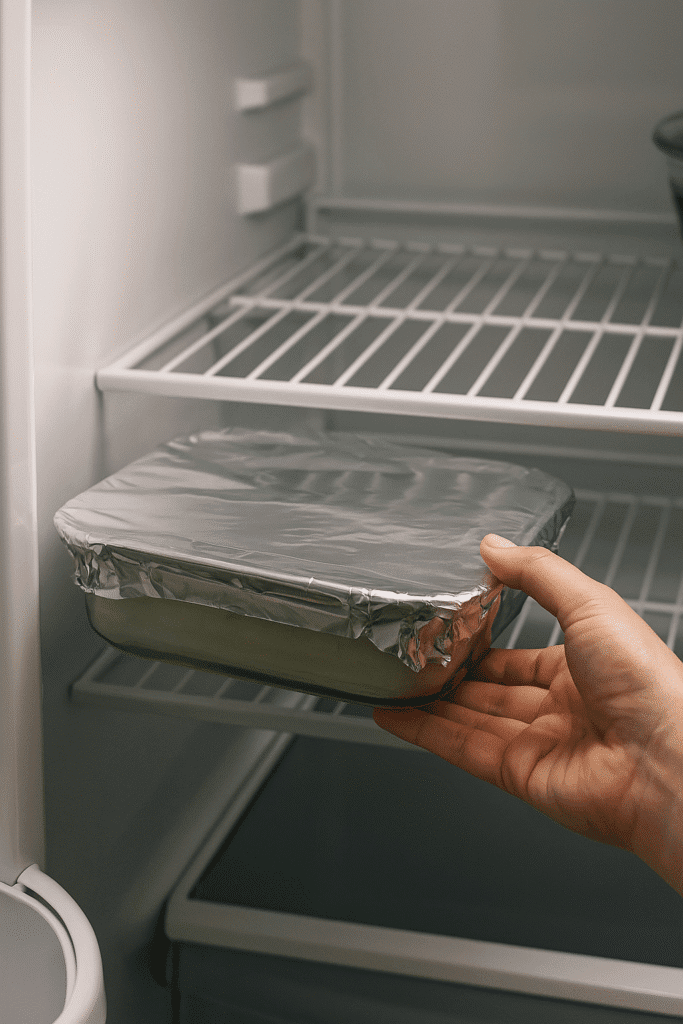
- Let freeze for at least 4 hours, or for the creamiest results, overnight.
🧊 Texture Note: The longer it chills, the firmer and more scoopable the texture will be, just like store-bought ice cream.
Step 6: Serve & Enjoy
- Remove the pan from the freezer and let it sit at room temperature for 10–15 minutes before scooping. This softens it just enough for that perfect scoop.
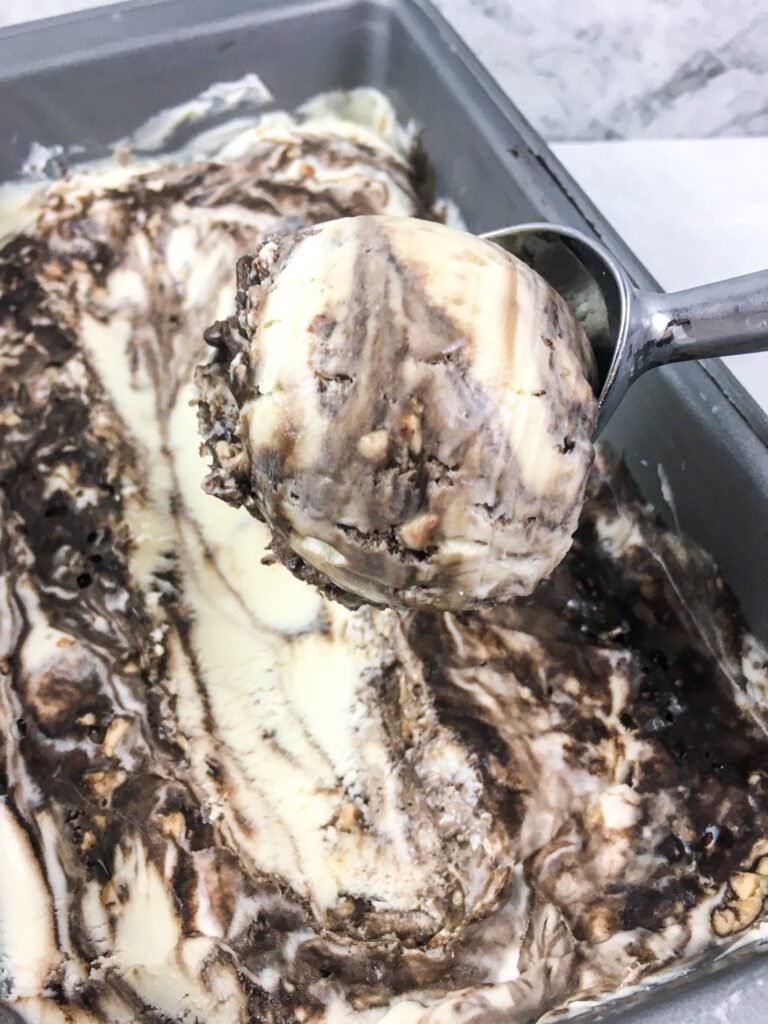
- Use a warmed ice cream scoop (dip it in hot water, then wipe dry) for smooth, clean portions.
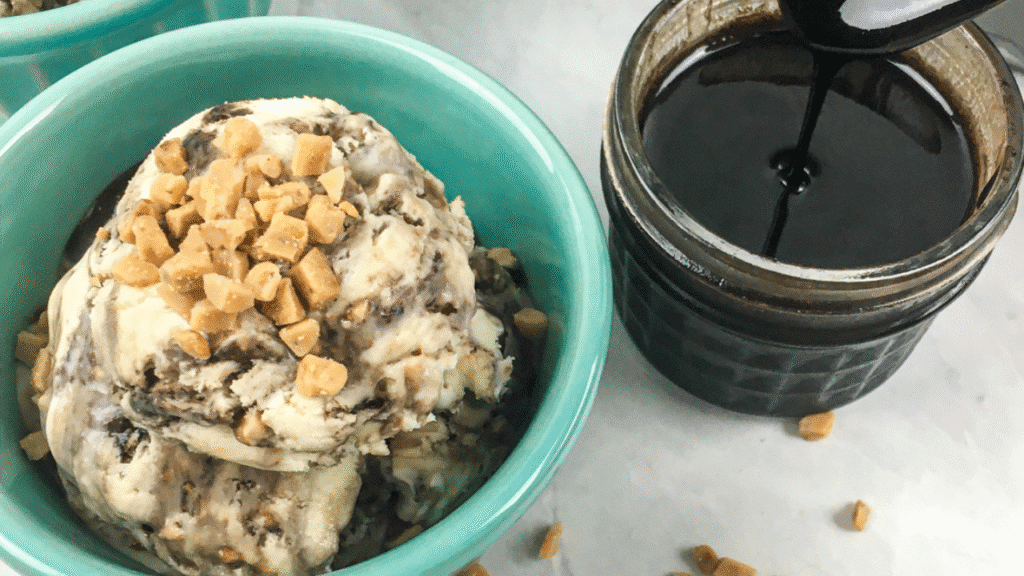
- Serve in bowls, cones, or even between two cookies for an ice cream sandwich.

- Top with extra chocolate syrup, toffee bits, or your favorite crushed candy for a final flourish.

✨ Optional Garnishes: A dollop of whipped cream, chocolate curls, or a dusting of cocoa powder makes it party-ready.
🧠 Tips & Tricks for Perfect No-Churn Ice Cream

These kitchen-tested tricks will help you level up this recipe from great to unforgettable. Whether you’re aiming for extra creaminess, bolder flavors, or new textures, these tips will guide you like a pro.
1. Chill Everything First
Cold ingredients are the secret to success.
- Heavy cream whips faster and holds its shape better when it’s straight from the fridge.
- Chilled syrup blends more evenly into the mixture and won’t deflate your whipped base.
- You can even chill your mixing bowl for a few minutes in the freezer to give your whipped cream a head start.
🧊 Bonus tip: If your kitchen runs warm, pop your loaf pan in the freezer while you mix the ingredients. Starting cold helps the mixture set faster.
2. Make It Mocha
Want deeper, bolder flavor?
Stir 1 teaspoon of instant espresso powder into the chocolate syrup while it’s cooking. This small addition brings out the cocoa’s richness and adds a subtle coffee note like a frozen mocha truffle.
🍫 This twist is perfect for coffee lovers and makes the ice cream feel a little more grown-up (especially when paired with dark chocolate chips or a splash of Irish cream liqueur).
3. Add a Crunch Factor
Toffee bits already add great texture, but layering in a second crunch makes it more dynamic. Try:
- Chopped toasted nuts (almonds, pecans, or hazelnuts work great)
- Crushed pretzels for a salty-sweet contrast
- Crisped rice cereal for an airy bite
- Broken waffle cone pieces for a fun presentation
🧠 Texture Tip: For best results, fold in the crunchy mix-ins just before layering. Don’t overmix or they’ll get soggy.
4. Want It Richer? Add Chocolate Chips
For a more indulgent twist, fold in:
- Bittersweet chocolate chips
- Chopped dark chocolate chunks
- Mini semisweet chips for better distribution in every bite
This addition brings contrast and a satisfying snap, especially if you serve the ice cream slightly softened.
✨ Pro Flavor Pairing: Bittersweet chocolate + espresso + toffee = a complex, bakery-style flavor profile that tastes far more advanced than the prep time suggests.
Bonus Trick: Swirl Precision
Use a toothpick or chopstick instead of a butter knife for finer swirls for a more decorative presentation, especially helpful if you’re gifting the ice cream or serving at a party.
🔁 Substitutions & Variations
Make this no-churn ice cream truly your own with easy ingredient swaps, flavor twists, and elevated serving ideas. Whether you’re working with dietary needs or just want to try something new, these variations keep things exciting and crowd-pleasing.
Toffee Substitutes
No Heath Bits on hand? No problem. Swap in other sweet, crunchy favorites:
- Chopped Skor bars – Nearly identical to Heath, with a rich, buttery crunch.
- Almond Roca – Adds a hint of nuttiness and a firmer bite.
- Peanut brittle – Offers a caramelized crunch and a subtle peanut twist.
- Homemade toffee pieces – Make your own for extra bragging rights!
🧠 Tip: Keep pieces small, no larger than a chocolate chip, for the best texture and scoopability.
Dairy-Free Version
Yes, you can still enjoy this recipe if you’re dairy-free!
- Replace heavy cream with whipped coconut cream (chill cans overnight, scoop the solid part only).
- Swap sweetened condensed milk with coconut condensed milk (available in most natural food stores or online).
- Use dairy-free chocolate for the syrup or choose a vegan store-bought version.
🌱 Note: The coconut flavor will be noticeable, but it pairs beautifully with toffee or caramel for a tropical twist.
Swirl Substitutions
Not a fan of chocolate? No worries. Get creative with your ribbons:
- Salted caramel sauce – Adds buttery sweetness with a rich, golden color.
- Creamy peanut butter or almond butter – Warm slightly to make it drizzleable.
- Fruit preserves or jam – Raspberry, cherry, or strawberry swirls give a tart contrast and vibrant color.
- Nutella or cookie butter – For an ultra-indulgent treat.
🎨 Swirl Tip: Alternate thick and thin ribbons to create visual drama in every scoop.
Add Extra Texture
Boost the fun and mouthfeel by mixing in something unexpected:
- Crushed Oreos – Chocolate + cream-filled crunch, always a win.
- Graham cracker crumbs – Adds a subtle honey note and s’mores vibes.
- Mini marshmallows – Especially great for kids or themed occasions.
- Chopped chocolate-covered nuts – Adds richness and a savory edge.
🔄 Fold in these extras at the very end, just before layering into the pan.
🍷 Suggested Pairings

Whether you’re serving this at a dinner party, date night, or just treating yourself, pair it with something special to elevate the experience.
| Category | Pairing Ideas | Why It Works |
|---|---|---|
| Coffee & Espresso | Fresh espresso shots or affogato-style pour-over | Creates an instant Italian café dessert; balances sweetness and softens the ice cream. |
| Cookies & Baked Treats | Salted caramel cookies, brown butter cookies, shortbread, or chocolate chip cookies | Perfect for sides or ice cream sandwiches; adds texture and complements the sweet-savory balance. |
| Dessert Beverages | Port wine, Irish cream liqueur, Amaretto, or hazelnut liqueur | Port brings fruity richness; Irish cream adds warmth; nut liqueurs highlight toffee flavors. |
✅ Final Thoughts

This no-churn toffee chocolate ice cream is more than just a dessert. It’s a reminder that homemade doesn’t have to mean hard. You don’t need an ice cream maker, a culinary degree, or a full afternoon in the kitchen to create something truly special. With just a few familiar ingredients, some simple techniques, and a little patience while it freezes, you’ll be rewarded with a rich, creamy, flavor-packed treat that’s as satisfying to make as it is to eat.
Whether you keep it classic with chocolate and toffee, experiment with swirls and add-ins, or go dairy-free with coconut cream, this recipe is incredibly flexible and endlessly fun to personalize. It’s perfect for summer gatherings, last-minute dinner parties, or quiet weeknights when you need a sweet scoop of comfort.
✨ Now it’s your turn!
I’d love to see how you make this recipe your own. Whether you swapped in caramel, added espresso, or went full-on s’mores style. Share your creation on social media and tag @KitchenKnowHowHub or use #KitchenKnowHowHub so I can cheer you on (and even feature your version!).
Don’t forget to save this recipe, share it with a fellow dessert lover, or pin it for your next ice cream craving. Sweet creativity starts here!
Happy Cooking! 👨🍳🍨
❓ Frequently Asked Questions
These are the most common questions home cooks have about making no-churn ice cream—and how to ensure every batch turns out rich, creamy, and absolutely delicious.
1. How long does no-churn ice cream last in the freezer?
Homemade no-churn ice cream will keep well in the freezer for up to 2 weeks when stored in an airtight container.
To maintain a creamy texture and avoid ice crystals, press a layer of plastic wrap directly onto the surface before sealing the lid.
🧊 Tip: After two weeks, the texture may become slightly icy or dense, but it’s still safe to eat.
2. Can I make this recipe dairy-free?
Yes! For a dairy-free version, swap the heavy cream with whipped coconut cream (use the thick part from a chilled can of full-fat coconut milk) and use coconut-based sweetened condensed milk.
Just keep in mind that the flavor will take on a noticeable coconut profile, which pairs nicely with toffee, chocolate, and even coffee swirls.
🌱 Great for: Vegan diets or those avoiding dairy. Check that your toffee mix-ins are also dairy-free.
3. What can I use instead of Heath toffee bits?
If you don’t have Heath English Toffee Bits, try:
- Chopped Skor bars
- Crushed almond roca
- Peanut brittle pieces
- Chopped chocolate-covered toffee or nut bars
Just make sure any substitutions are chopped into small, bite-sized pieces so they freeze evenly and don’t make scooping difficult.
4. Can I use store-bought chocolate syrup instead of homemade?
Yes, store-bought syrup can be used for convenience. However, the homemade version has a deeper cocoa flavor and a thicker texture that creates more dramatic swirls throughout the ice cream.
If you’re short on time, go for store-bought. But if you want that rich, fudgy magic, the homemade syrup is worth the 5 minutes.
5. How long does it take to freeze no-churn ice cream?
The ice cream needs at least 4 hours in the freezer to firm up, but for the best scoopable texture, overnight freezing is ideal.
This allows the flavors to settle, the mix to fully solidify, and the texture to become smooth and creamy.
⏳ Quick Tip: If you’re serving it for an event, prep it the night before and let it rest at room temperature for 10–15 minutes before scooping.
6. Can I make this ice cream ahead for a party or special occasion?
Absolutely. This recipe is perfect for make-ahead entertaining.
Prepare the ice cream up to 3 days in advance, store it in a loaf pan or lidded container, and add garnishes like toffee bits or chocolate drizzle just before serving for a fresh, polished presentation.
🎉 Bonus: You can portion it into individual jars or cups ahead of time for a mess-free dessert bar.
7. Why is my no-churn ice cream icy instead of creamy?
If your final texture is icy or grainy instead of silky, a few things might be the cause:
- The ingredients weren’t fully chilled before mixing.
- The whipped cream was under- or over-beaten.
- The folding step was too aggressive, which deflated the whipped cream.
- You skipped the plastic wrap, allowing air exposure and ice crystal formation.
🧠 Solution: Always chill your cream, syrup, and even your mixing bowl. Use a light hand when folding and press wrap directly onto the surface before freezing.
No-Churn Toffee Chocolate Ice Cream Recipe!
Ingredients
Equipment
Method
- To prepare the chocolate syrup, combine the water, sugar, cocoa powder, vanilla extract, and salt in a small skillet over medium heat.
- Whisk continuously until the sugar dissolves and the cocoa is fully incorporated, about 2–3 minutes.
- Remove from the heat and let cool completely.
- Transfer to an airtight container and refrigerate until ready to use.
- Pour the heavy cream into a large mixing bowl and beat on high speed until light and fluffy with stiff peaks.
- Stop occasionally to scrape down the sides of the bowl with a spatula to ensure even whipping.
- Set aside.
- In a large bowl, combine the sweetened condensed milk and vanilla extract.
- Gently fold in a small amount of the whipped cream to lighten the mixture, take care not to overmix.
- Add the remaining whipped cream and fold until just combined and smooth.
- Pour half of the whipped cream mixture into a 9×5-inch loaf pan and spread evenly.
- Drizzle with half of the chocolate syrup and sprinkle ⅓ cup of toffee bits evenly over the top.
- Add the remaining whipped cream mixture and smooth the surface.
- Drizzle with the remaining syrup and sprinkle with the rest of the toffee.
- Insert a butter knife into one end of the pan and gently drag it back and forth through the mixture to create a marbled swirl.
- Cover the pan with plastic wrap, pressing gently on the surface to remove air bubbles.
- Freeze for at least 4 hours, or overnight for best results.
- Remove the ice cream from the freezer 10–15 minutes before serving to soften slightly.
- Scoop into bowls or cones and garnish with extra chocolate syrup and toffee bits, if desired.
- Serve and enjoy.

Notes
Core Abbreviations:
- tsp = teaspoon (5 mL)
- Tbsp = tablespoon (15 mL; AU 20 mL)
- c = cup (240 mL)
- fl oz = fluid ounce (30 mL)
- oz = ounce, weight (28 g)
- lb = pound (454 g)
- g = gram
- kg = kilogram (1000 g)
- mL = milliliter
- L = liter (1000 mL)
- °F / °C = Fahrenheit / Celsius
Quick Conversions:
- 3 tsp = 1 Tbsp
- 2 Tbsp = 1 fl oz
- 8 fl oz = 1 cup
- 2 cups = 1 pint (473 mL)
- 2 pints = 1 quart (946 mL)
- 4 quarts = 1 gallon (3.79 L)